Connect AI Squared to Amazon S3
This guide will help you configure the Amazon S3 Connector in AI Squared to access and transfer data to your S3 bucket.Prerequisites
Before proceeding, ensure you have the necessary personal access key, secret access key, region, bucket name, and file path from your S3 account.Step-by-Step Guide to Connect to Amazon S3
Step 1: Navigate to AWS Console
Start by logging into your AWS Management Console.- Sign in to your AWS account at AWS Management Console.
Step 2: Locate AWS Configuration Details
Once you’re in the AWS console, you’ll find the necessary configuration details:-
Access Key and Secret Access Key:
- Click on your username at the top right corner of the AWS Management Console.
- Choose “Security Credentials” from the dropdown menu.
- In the “Access keys” section, you can create or view your access keys.
- If you haven’t created an access key pair before, click on “Create access key” to generate a new one. Make sure to copy the Access Key ID and Secret Access Key as they are shown only once.

-
Region:
- The AWS region can be selected from the top right corner of the AWS Management Console. Choose the region where your AWS Sagemaker resources is located and note down the region.
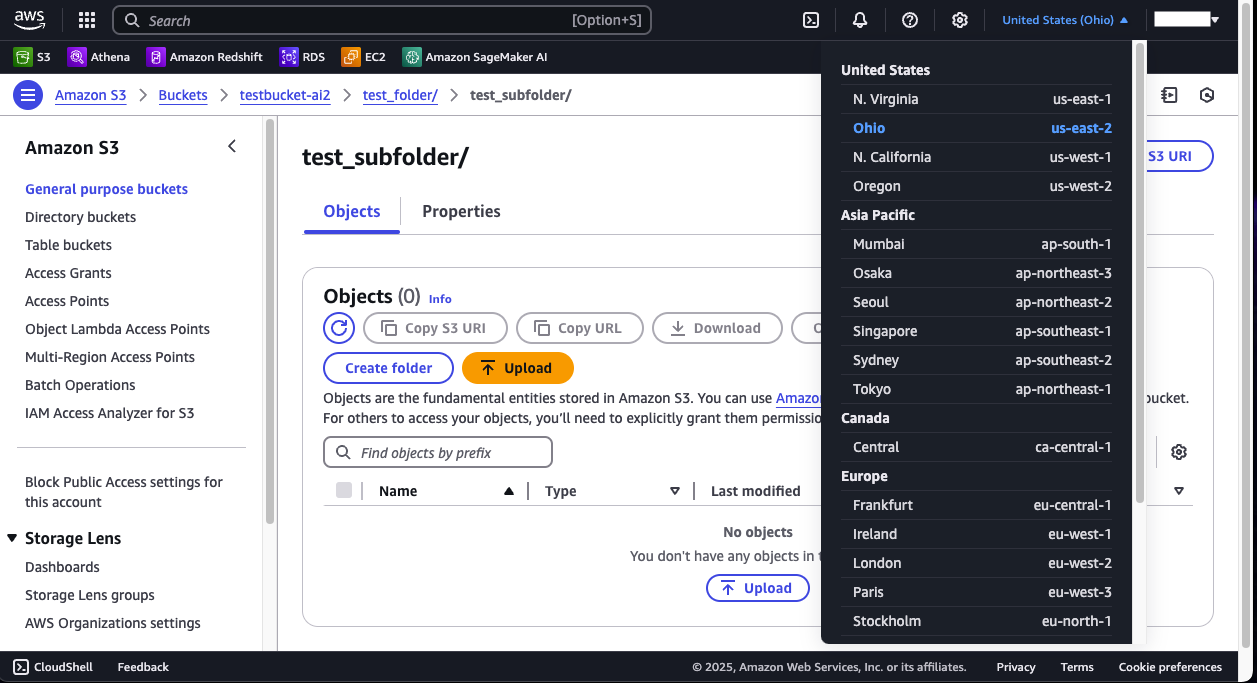
- The AWS region can be selected from the top right corner of the AWS Management Console. Choose the region where your AWS Sagemaker resources is located and note down the region.
-
Bucket Name:
- The S3 Bucket name can be found by selecting “General purpose buckets” on the left hand corner of the S3 Console. From there select the bucket you want to use and note down its name.
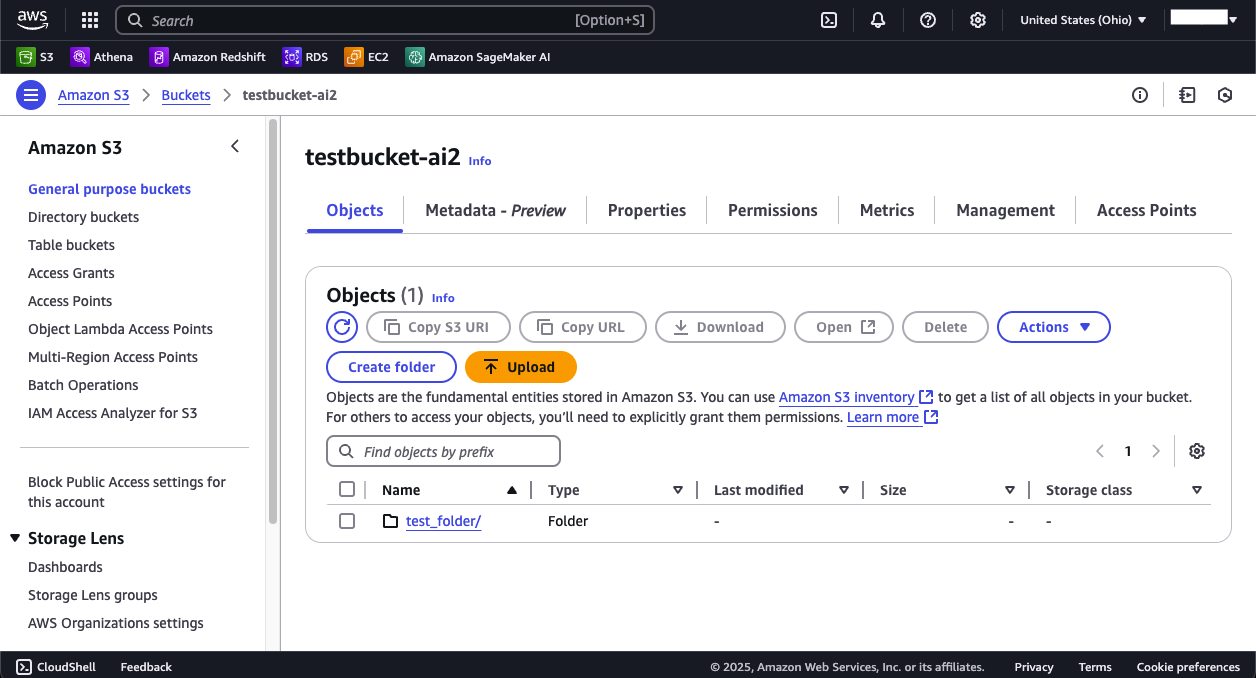
- The S3 Bucket name can be found by selecting “General purpose buckets” on the left hand corner of the S3 Console. From there select the bucket you want to use and note down its name.
-
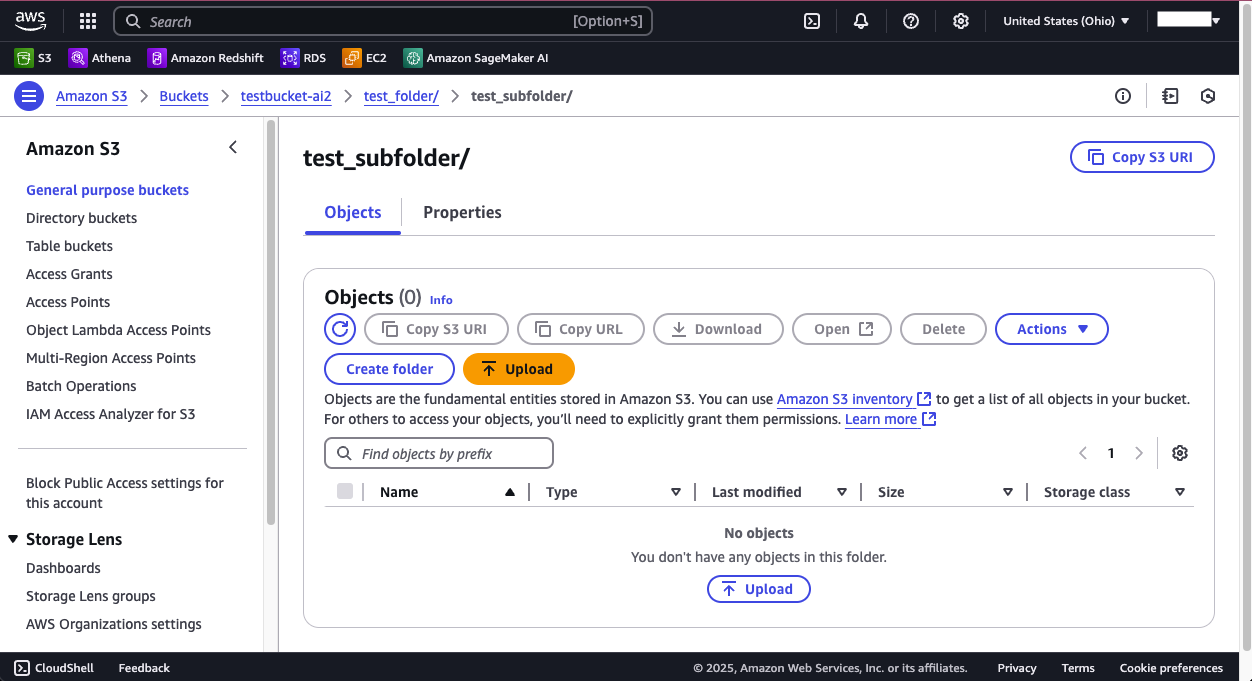
File Path
- After select your S3 bucket you can create a folder where you want your file to be stored or use an exist one.
Step 3: Configure Amazon S3 Connector in Your Application
Now that you have gathered all the necessary details, enter the following information in your application:- Personal Access Key: Your AWS IAM user’s Access Key ID.
- Secret Access Key: The corresponding Secret Access Key.
- Region: The AWS region where your Sagemaker resources are located.
- Bucket Name: The Amazon S3 Bucket you want to access.
- File Path: The Path to the directory where files will be written.
- File Name: The Name of the file to be written.
Step 4: Test the Amazon S3 Connection
After configuring the connector in your application:- Save the configuration settings.
- Test the connection to Amazon S3 from your application to ensure everything is set up correctly.
Supported sync modes
This guide will help you seamlessly connect your AI Squared application to MariaDB, enabling you to leverage your database’s full potential.