> ## Documentation Index
> Fetch the complete documentation index at: https://docs.squared.ai/llms.txt
> Use this file to discover all available pages before exploring further.
# WatsonX.Data
## Connect AI Squared to WatsonX.Data
This guide will help you configure the WatsonX.Data Connector in AI Squared to access your WatsxonX.Data databases.
### Prerequisites
Before proceeding, ensure you have the following details:
API key, region, Instance Id (CRN), Engine Id, Database, and Schema.
## Step-by-Step Guide to Connect to a WatsonX.Data Database Engine.
## Step 1: Navigate to WatsonX.Data Console
Start by logging into your [WatsonX Console](https://dataplatform.cloud.ibm.com/wx/home?context=wx).
## Step 2: Locate Developer Access
Once you're in WatsonX, you'll need find the necessary configuration details
by following these steps in order:
### **API Key:**
1. Scroll down to Developer access.
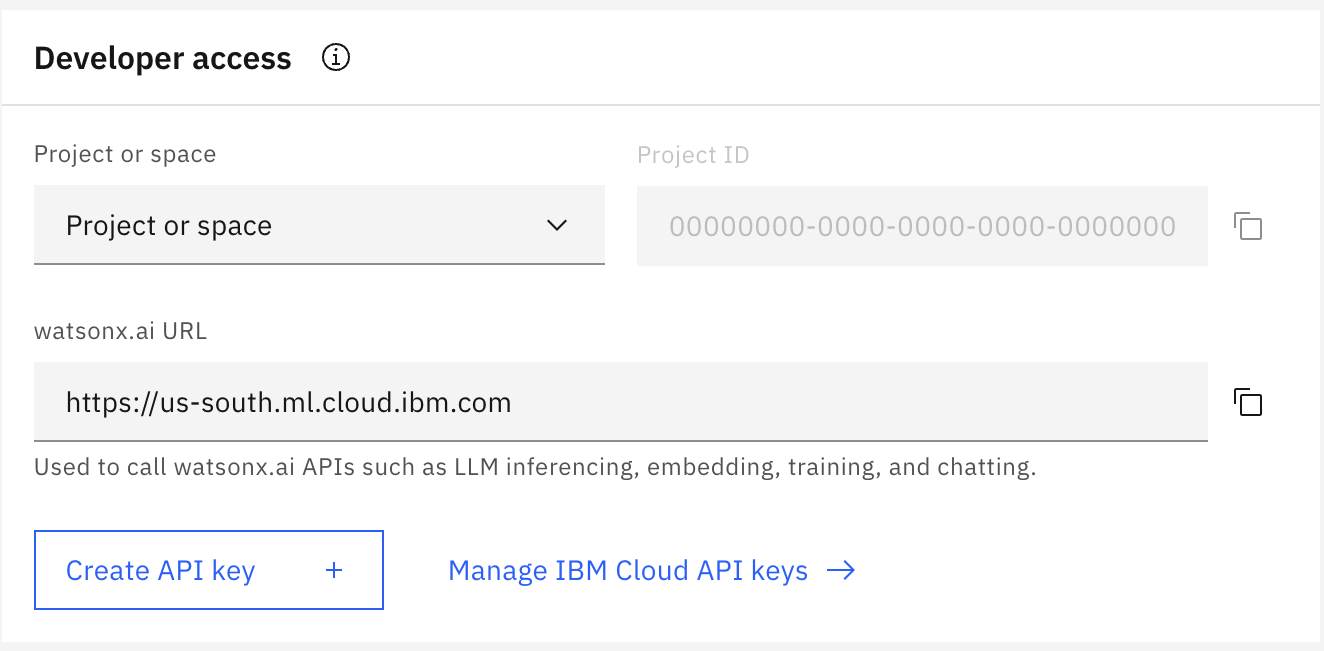 2. Click on `Manage IBM Cloud API keys` to view your API keys.
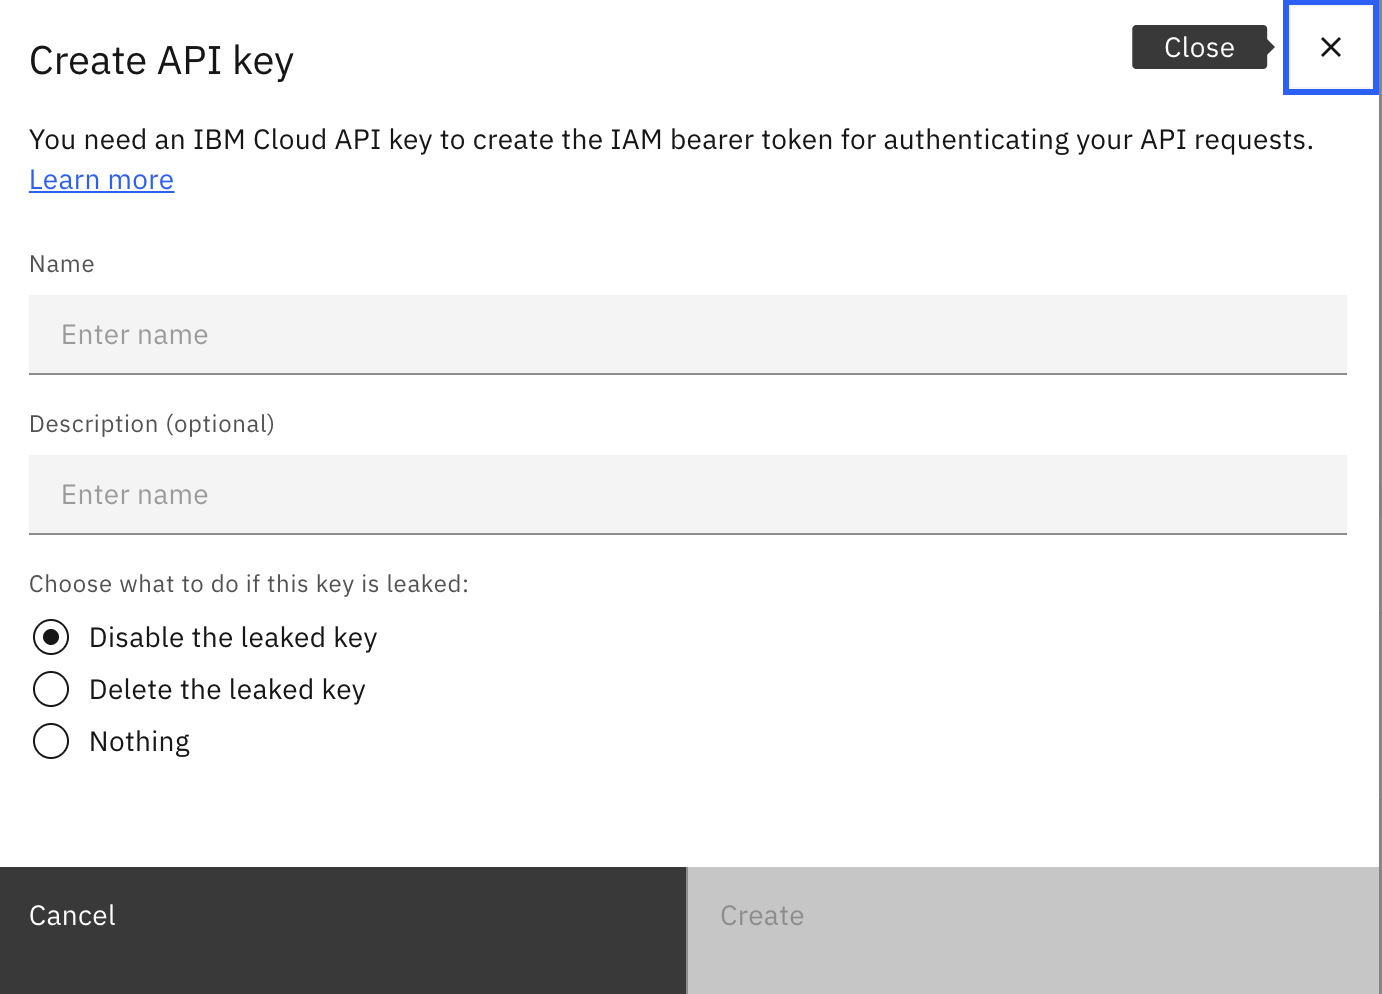
3. If you haven't created an API key before, click on `Create API key` to generate a new one. Make sure to copy the API Key as they are shown only once.
2. Click on `Manage IBM Cloud API keys` to view your API keys.
3. If you haven't created an API key before, click on `Create API key` to generate a new one. Make sure to copy the API Key as they are shown only once.
 ### Region
4. The IBM Cloud region can be selected from the top right corner of the WatsonX Console.
Choose the region where your WatsonX.Data resources are located and note down the region.
## Instance Id
5. Open the `Navigation Menu`, select `Administration`, `Services`, and finally `Service instances`.
### Region
4. The IBM Cloud region can be selected from the top right corner of the WatsonX Console.
Choose the region where your WatsonX.Data resources are located and note down the region.
## Instance Id
5. Open the `Navigation Menu`, select `Administration`, `Services`, and finally `Service instances`.
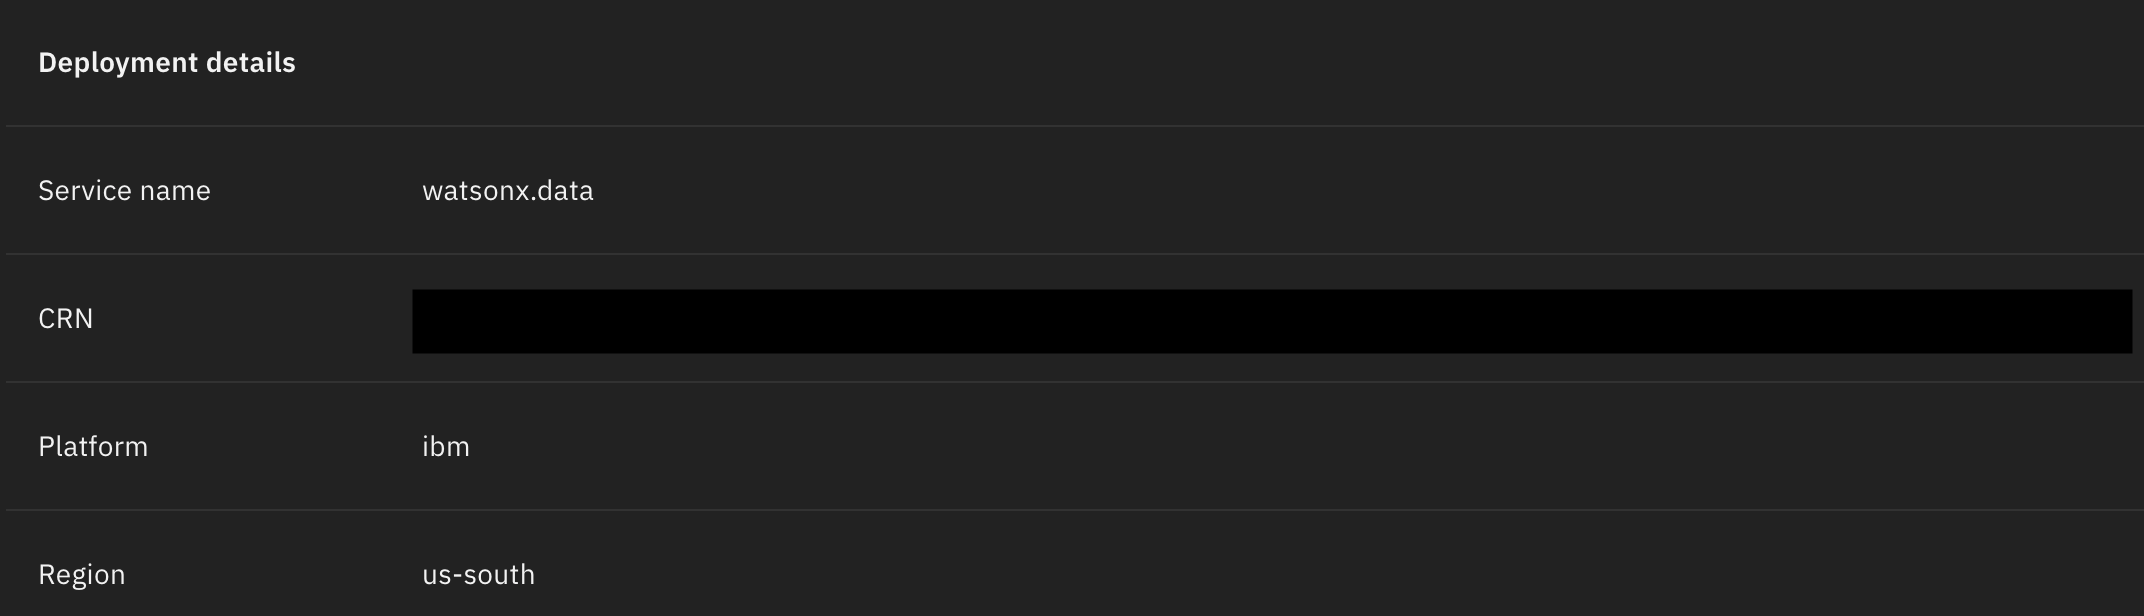
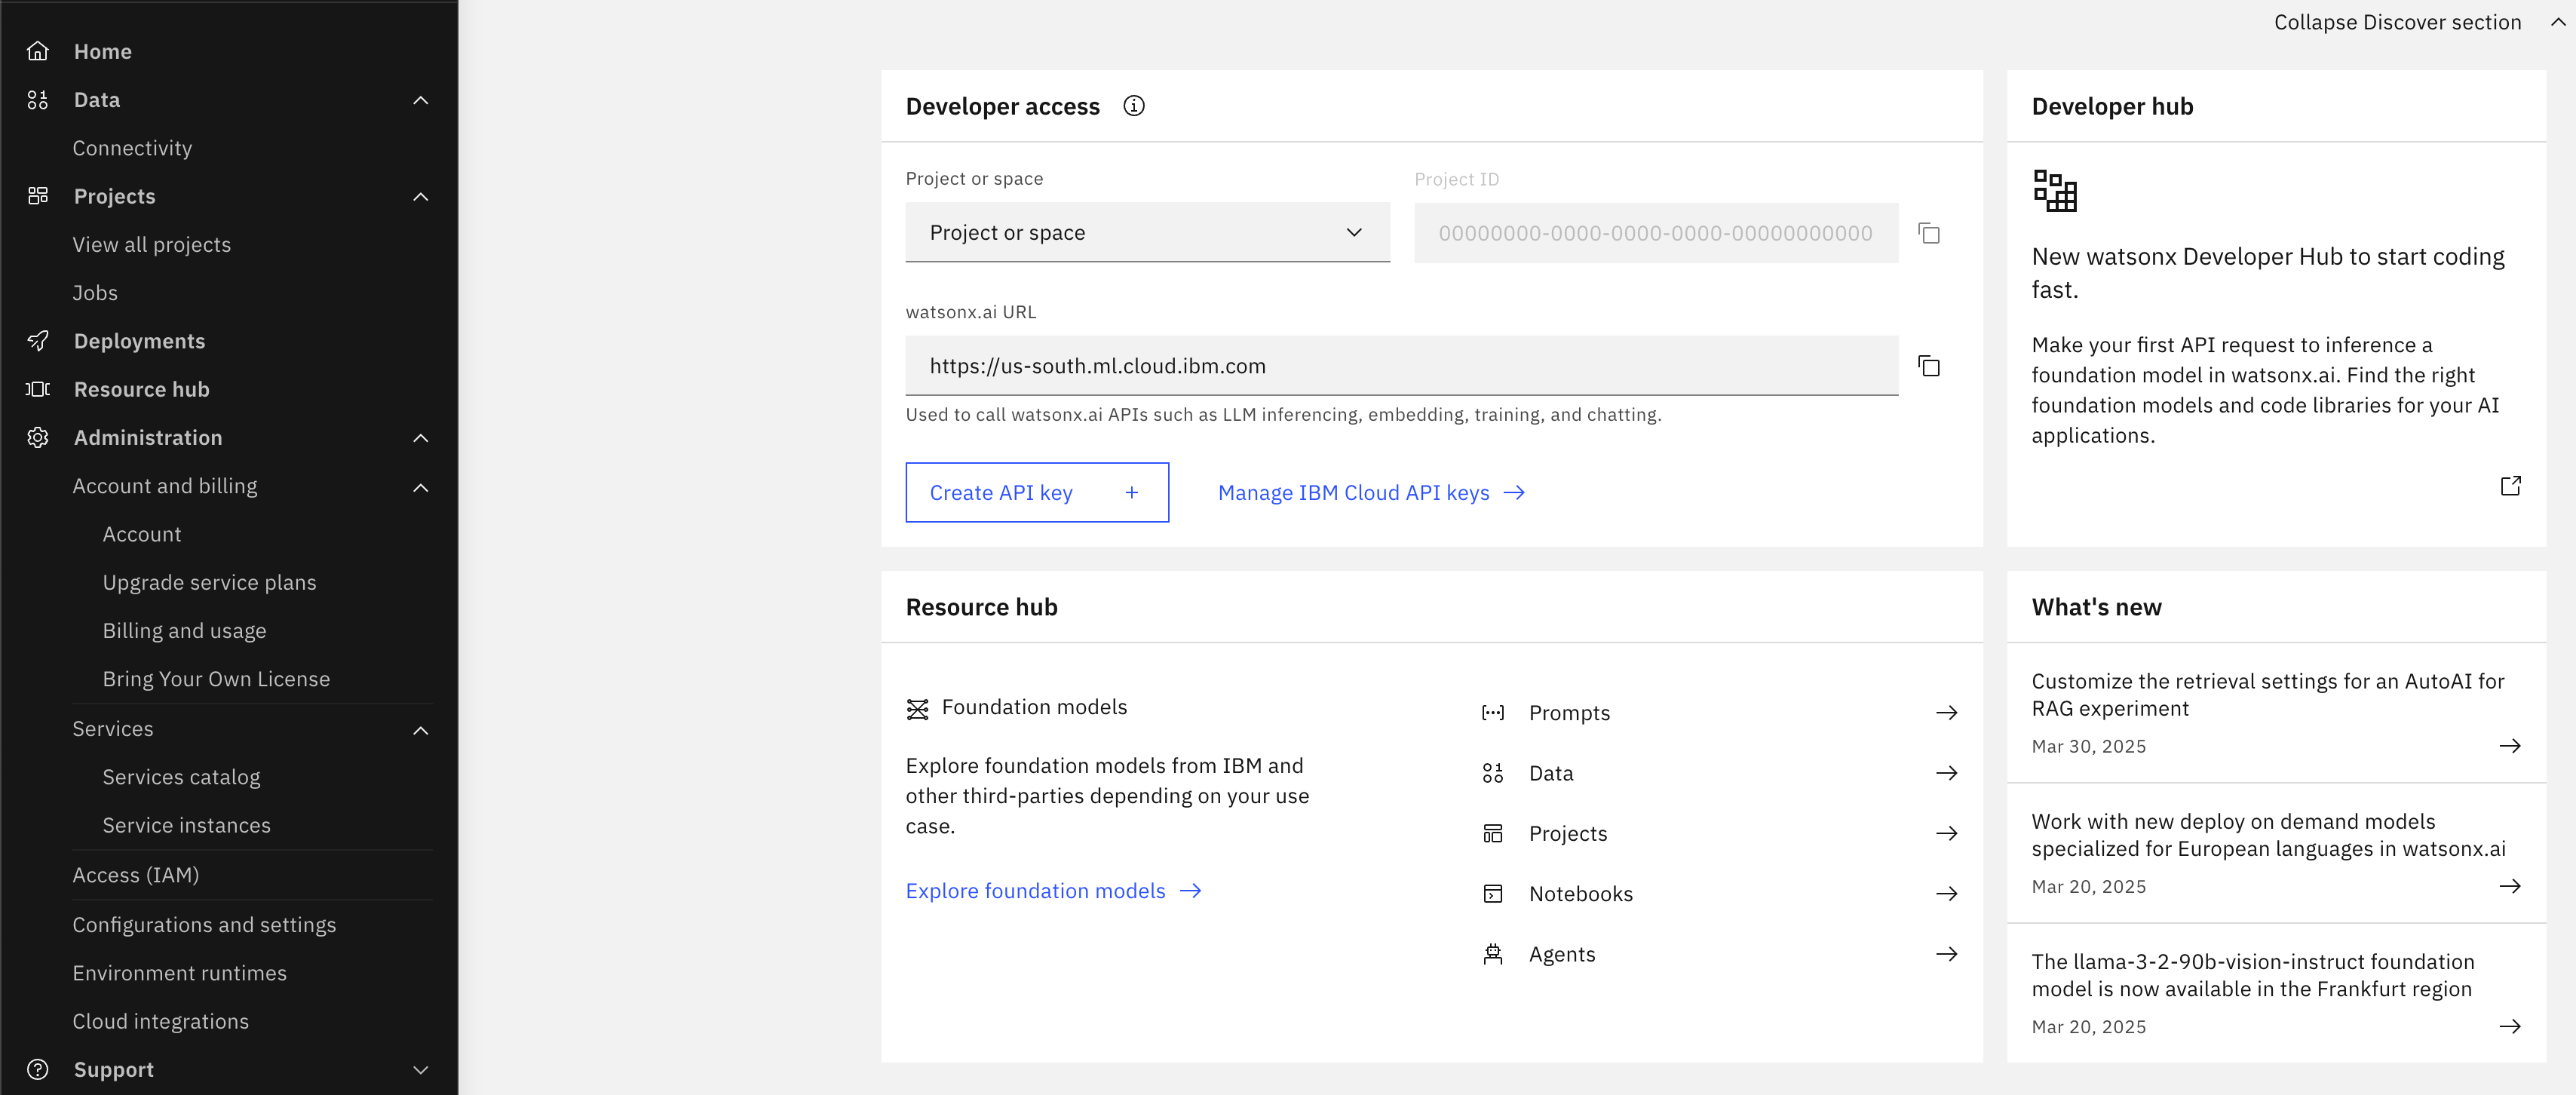 6. From the `Service instances` table, select your WatsonX.Data instance.
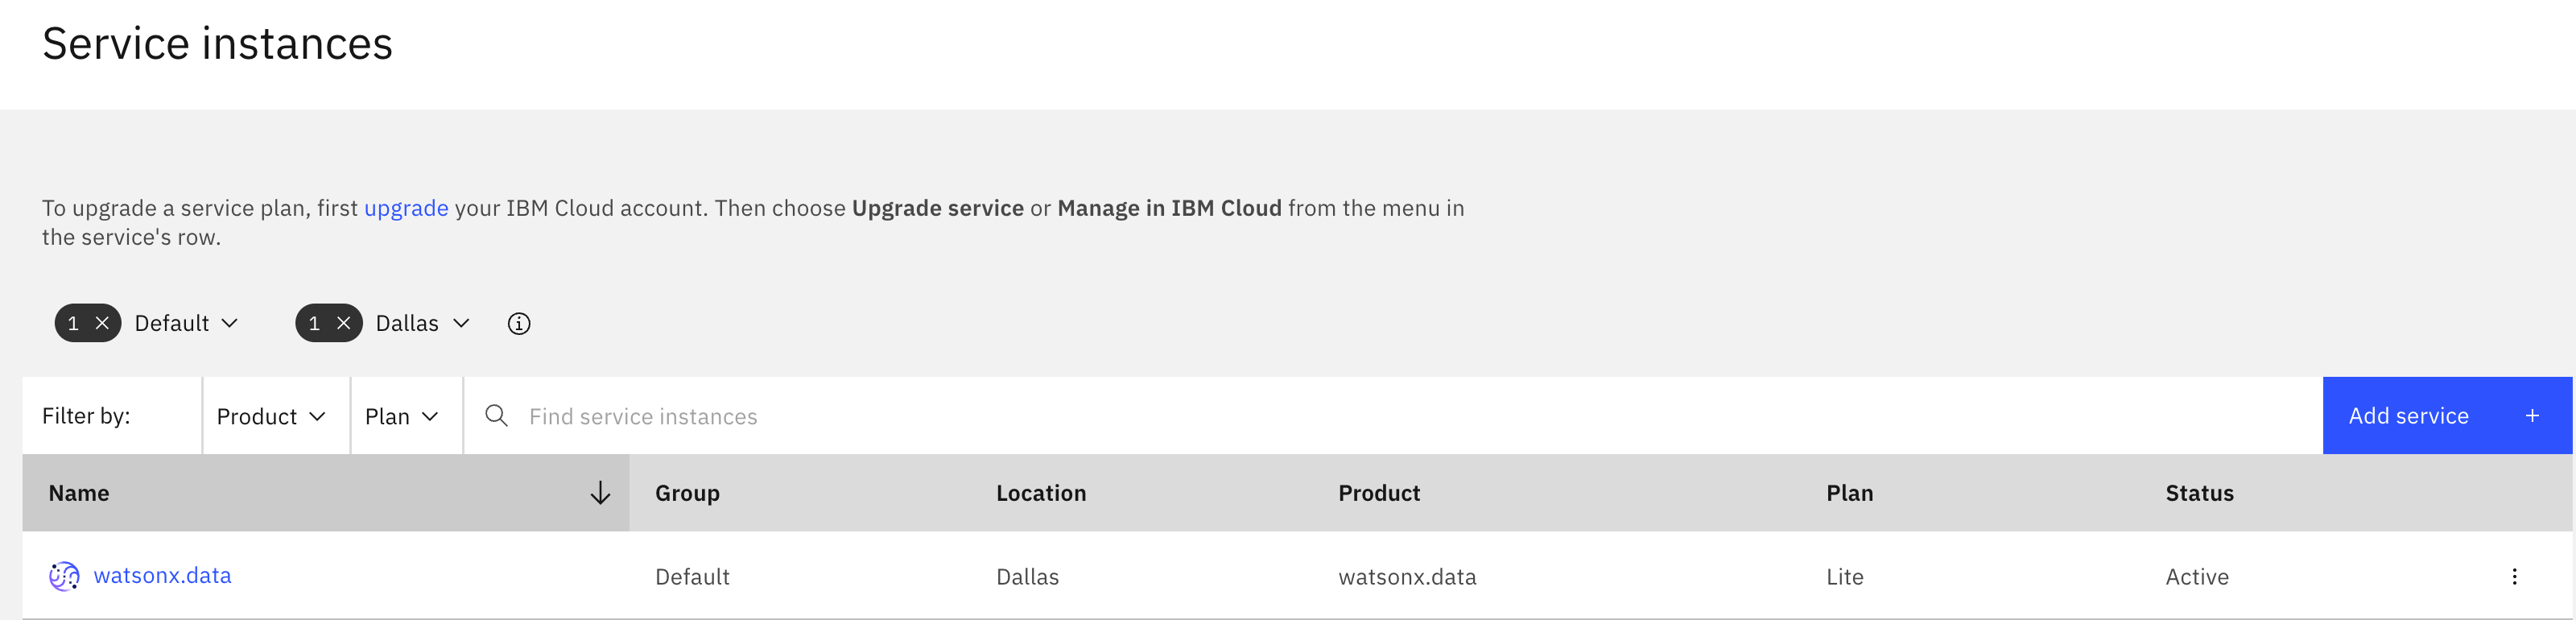 7. Scroll down to Deployment details, and write down the CRN, that's your Instance Id.
 ### Engine ID
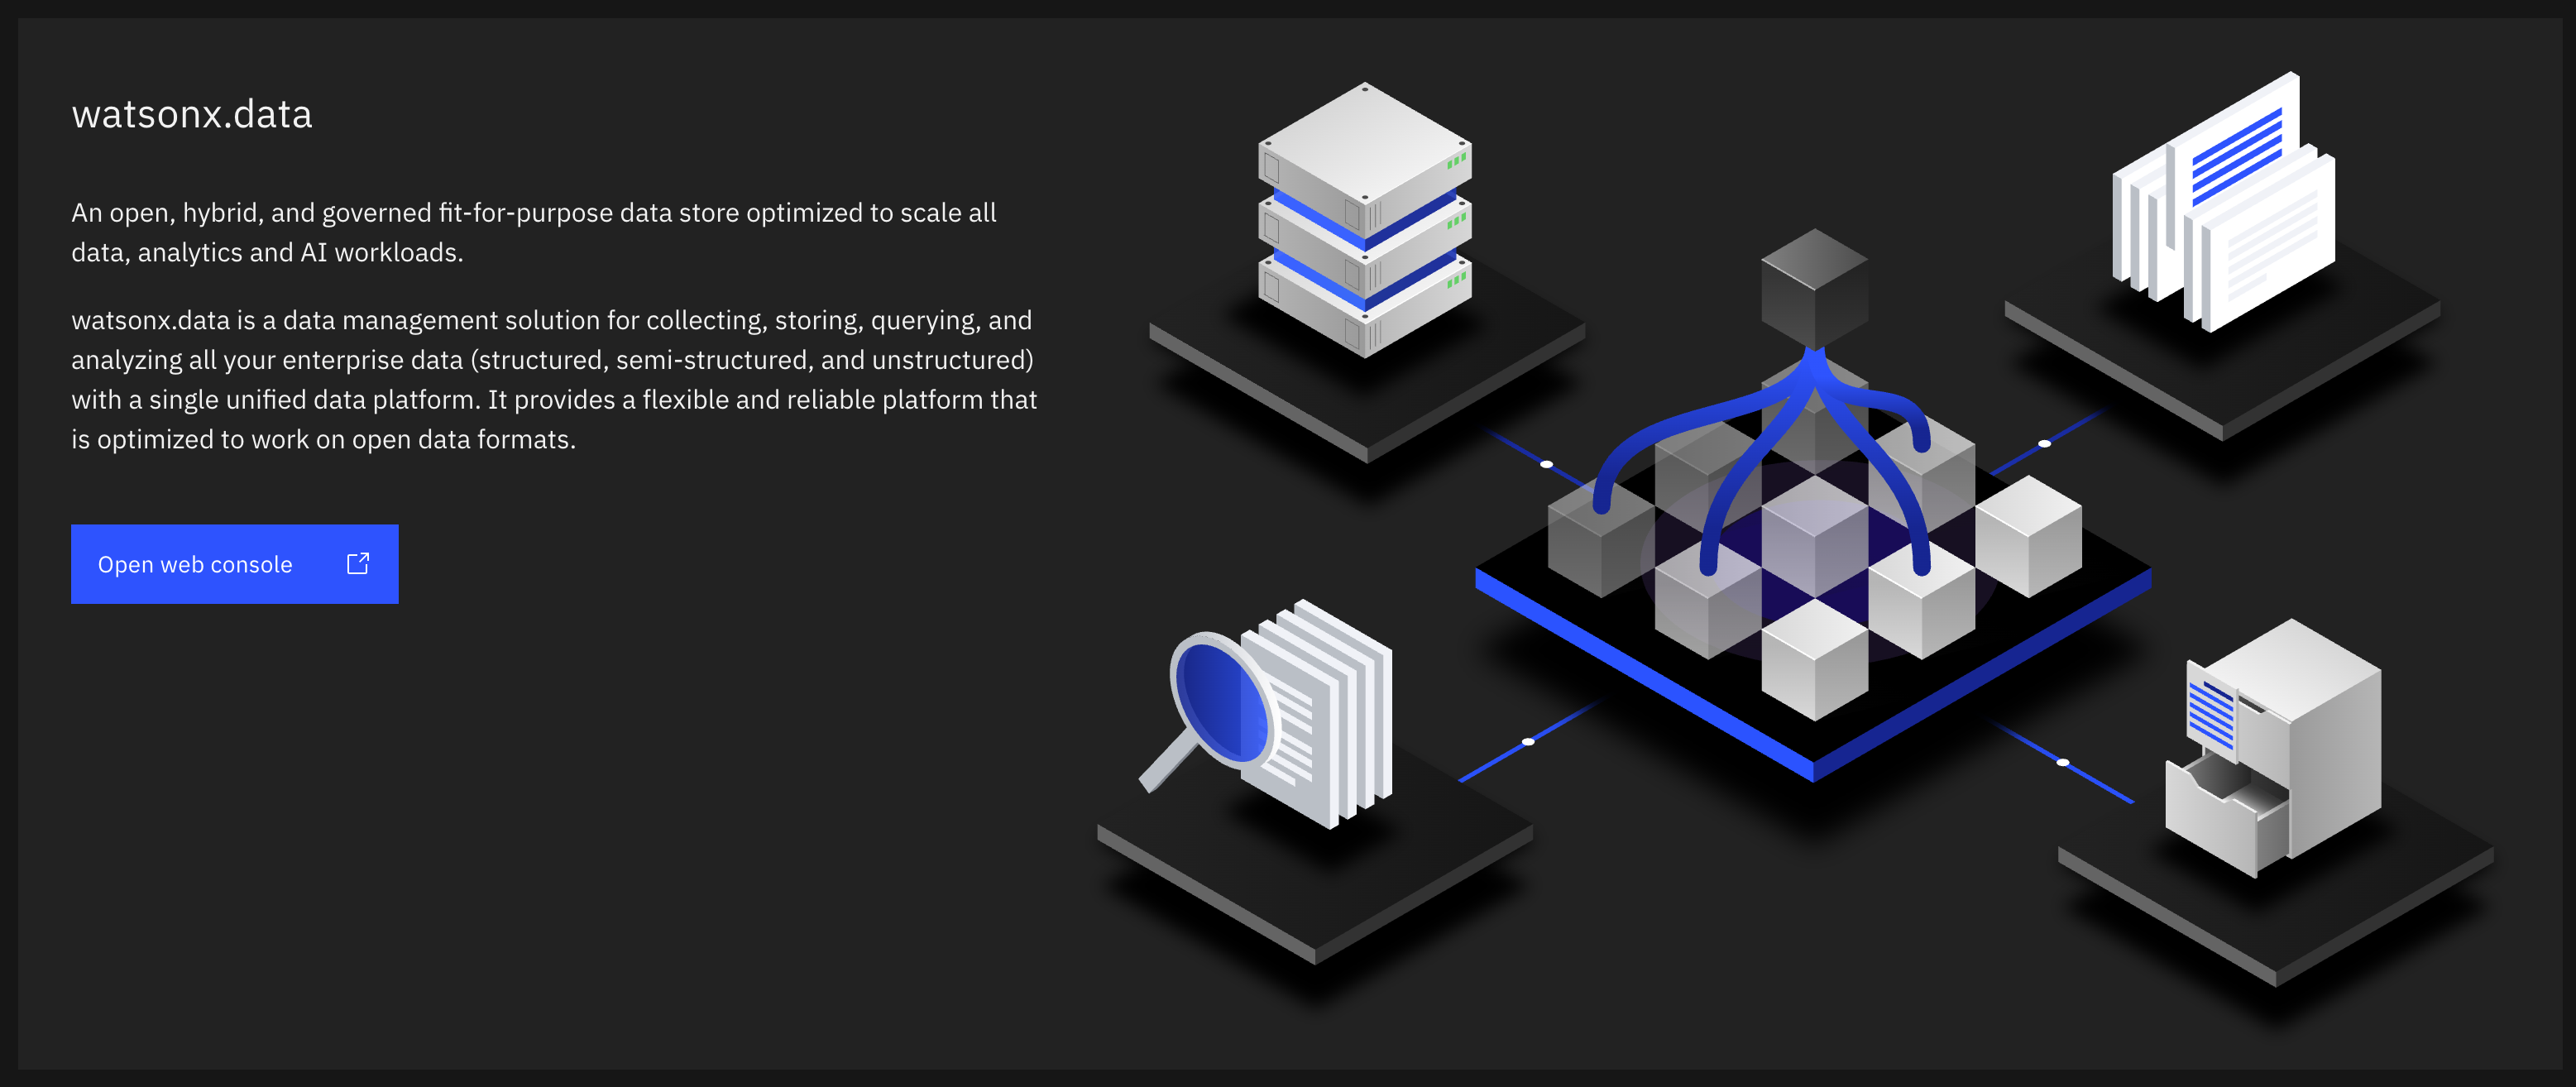
8. Scroll back up and click `Open web console`.
### Engine ID
8. Scroll back up and click `Open web console`.
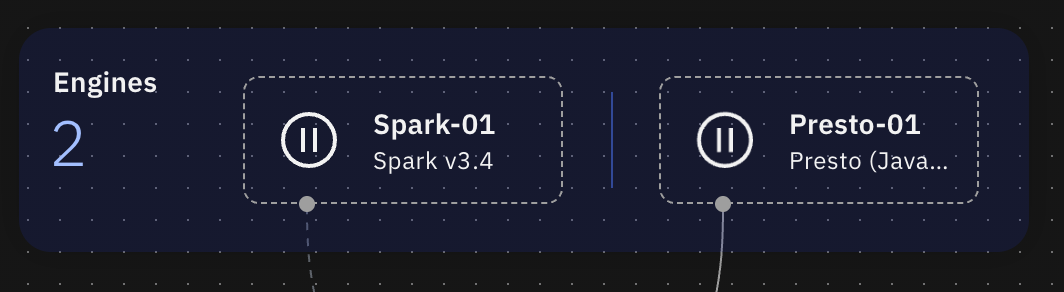
 9. Open the Global Menu, select `Infrastructure manager`.
10. Select the Presto engine you are building the connector for to show the Engine details.
9. Open the Global Menu, select `Infrastructure manager`.
10. Select the Presto engine you are building the connector for to show the Engine details.
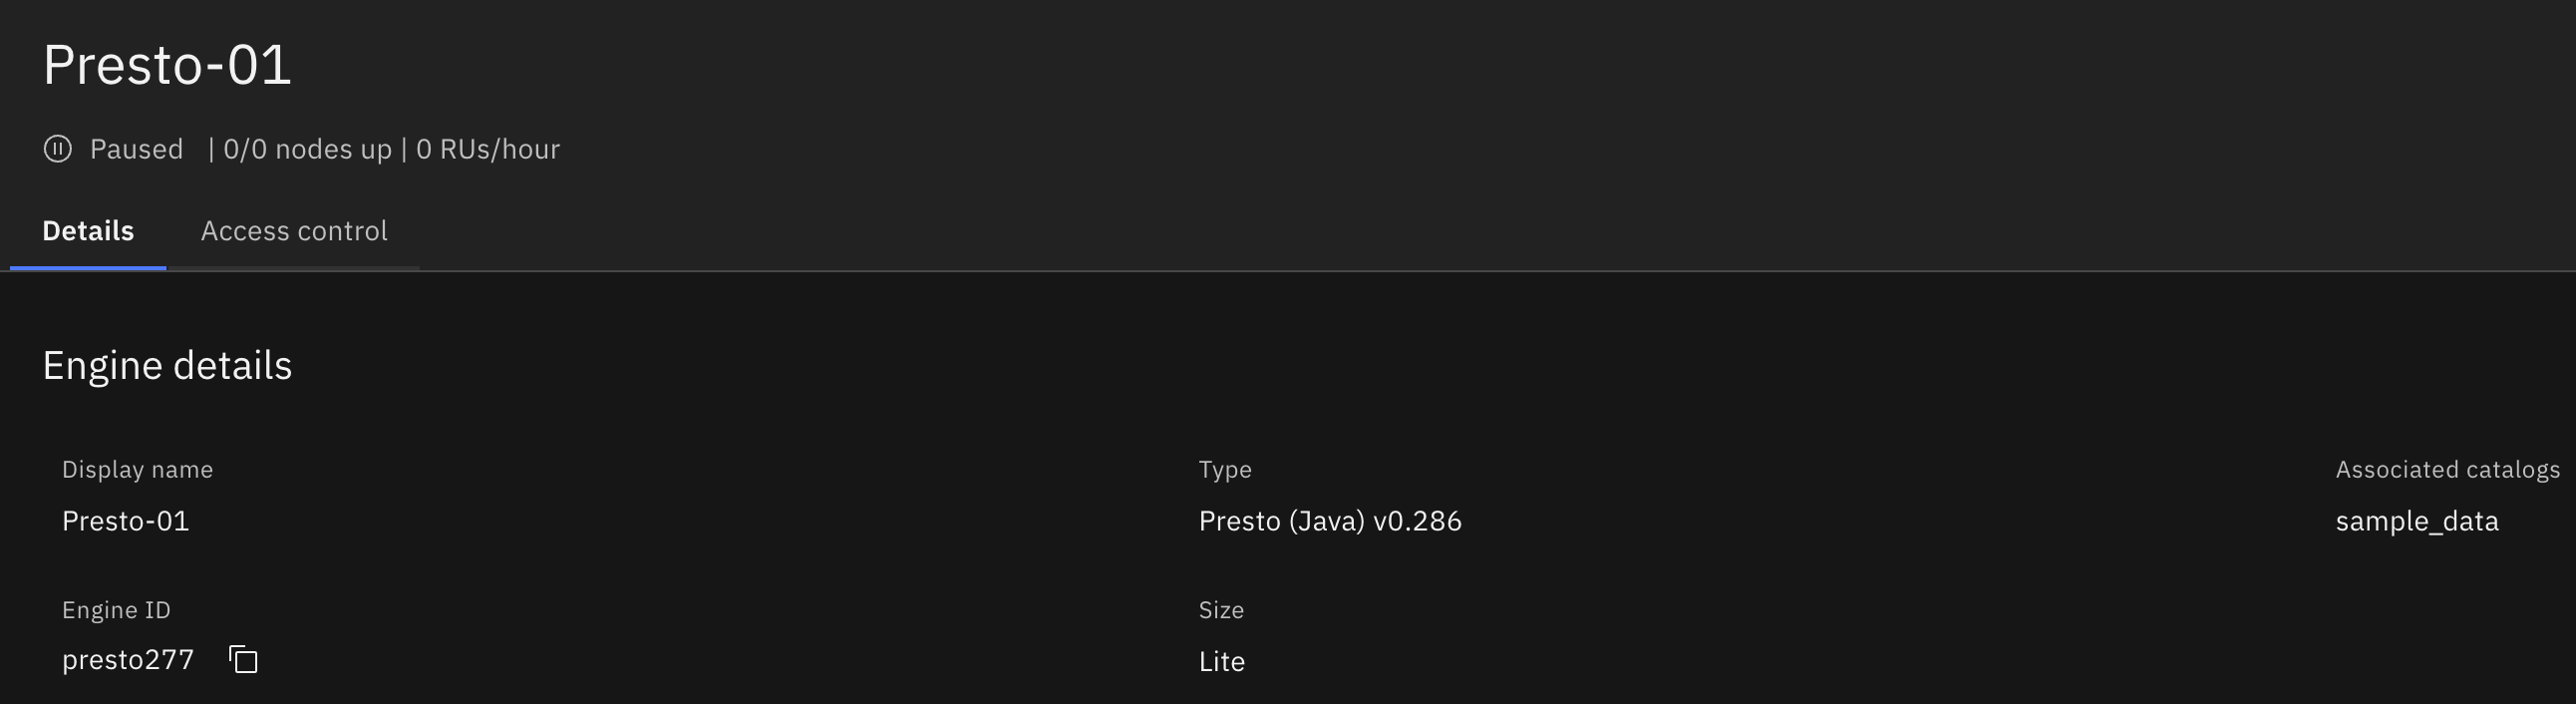
 11. Write down the Engine ID.
 ### Database
11. On the same screen as the previous step, your database is one of the Associated catalogs in the Presto engine.
### Schema
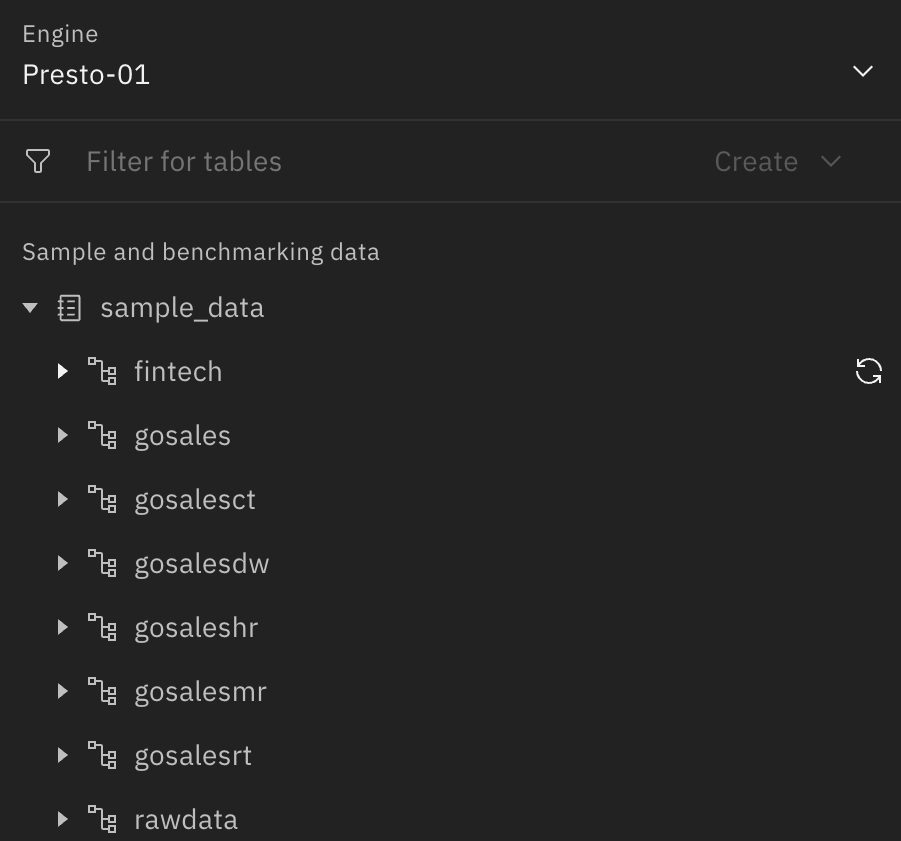
12. Open the Global Menu, select `Data manager`, and expand your associated catalog to show the available schemas.
### Database
11. On the same screen as the previous step, your database is one of the Associated catalogs in the Presto engine.
### Schema
12. Open the Global Menu, select `Data manager`, and expand your associated catalog to show the available schemas.
 ## Step 3: Configure WatsonX.Data Source Connector in Your Application
Now that you have gathered all the necessary details enter the following information:
* **API Key:** Your IBM Cloud API key.
* **Region:** The IBM Cloud region where your WatsonX.Data resources are located.
* **Instance Id:** The instance ID, or CRN (Clourd Resource Name) for your WatsonX.Data deployment.
* **Engine Id:** The Engine Id of the Presto engine.
* **Database:** The catalog associated to your Presto engine.
* **Schema:** The schema you want to connect to.
## Step 3: Configure WatsonX.Data Source Connector in Your Application
Now that you have gathered all the necessary details enter the following information:
* **API Key:** Your IBM Cloud API key.
* **Region:** The IBM Cloud region where your WatsonX.Data resources are located.
* **Instance Id:** The instance ID, or CRN (Clourd Resource Name) for your WatsonX.Data deployment.
* **Engine Id:** The Engine Id of the Presto engine.
* **Database:** The catalog associated to your Presto engine.
* **Schema:** The schema you want to connect to.