> ## Documentation Index
> Fetch the complete documentation index at: https://docs.squared.ai/llms.txt
> Use this file to discover all available pages before exploring further.
# Adding a Data Source
> How to connect and configure a business data source in AI Squared.
AI Squared allows you to integrate data from databases, warehouses, and storage systems to power downstream AI insights and business workflows.
Follow the steps below to connect your first data source.
***
## Step 1: Navigate to Data Sources
1. Go to **Sources** → **Data Sources** in the left sidebar.
2. Click **“Add Source”**.
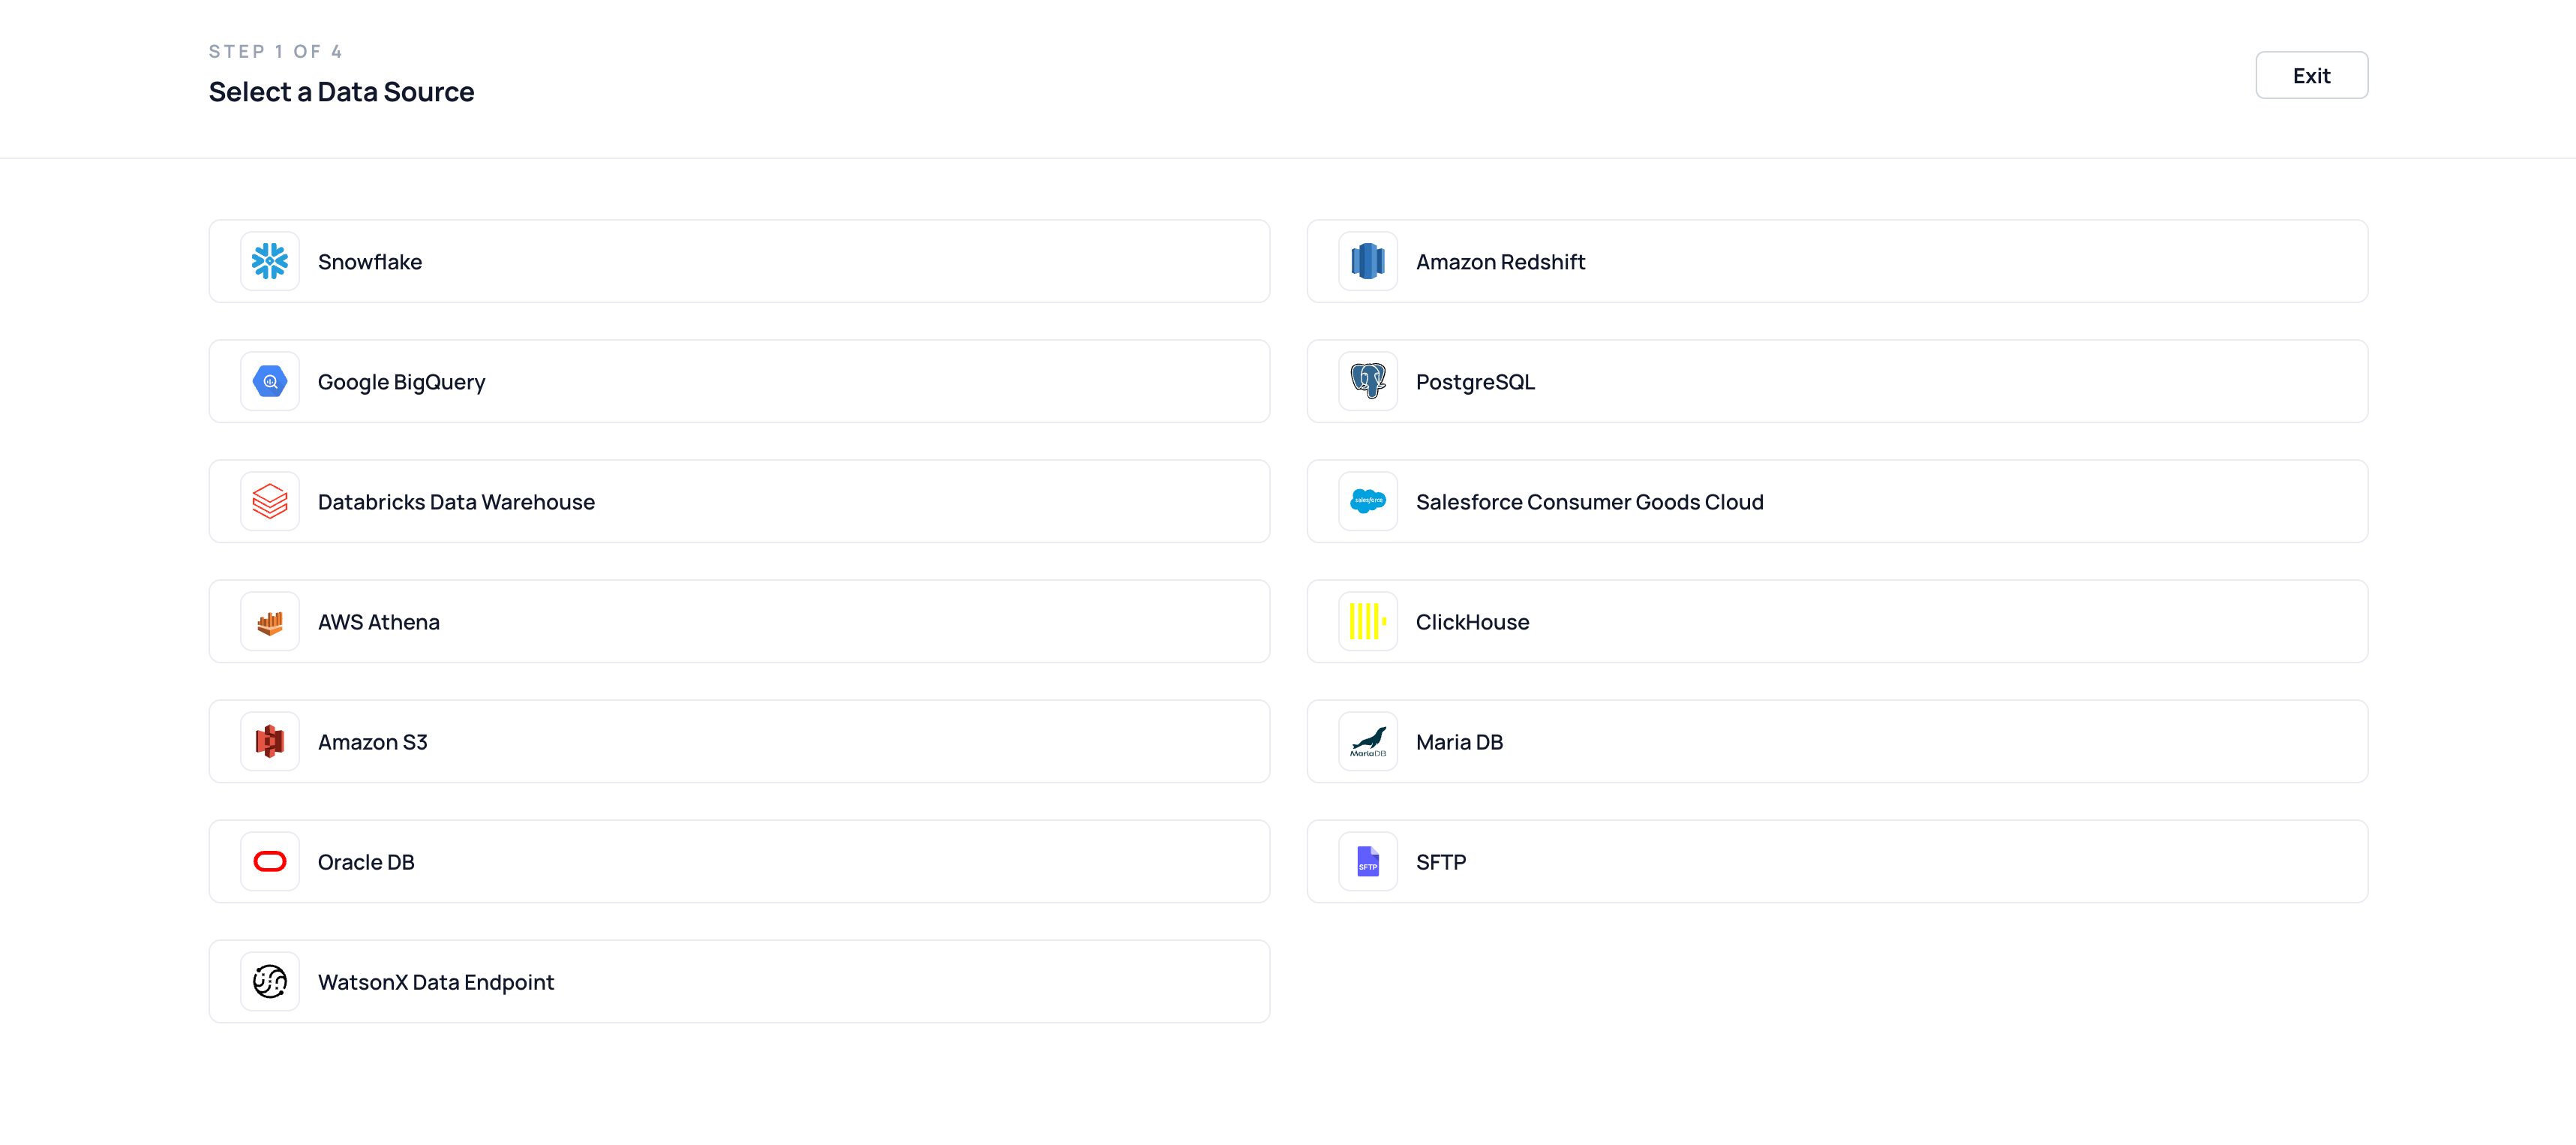
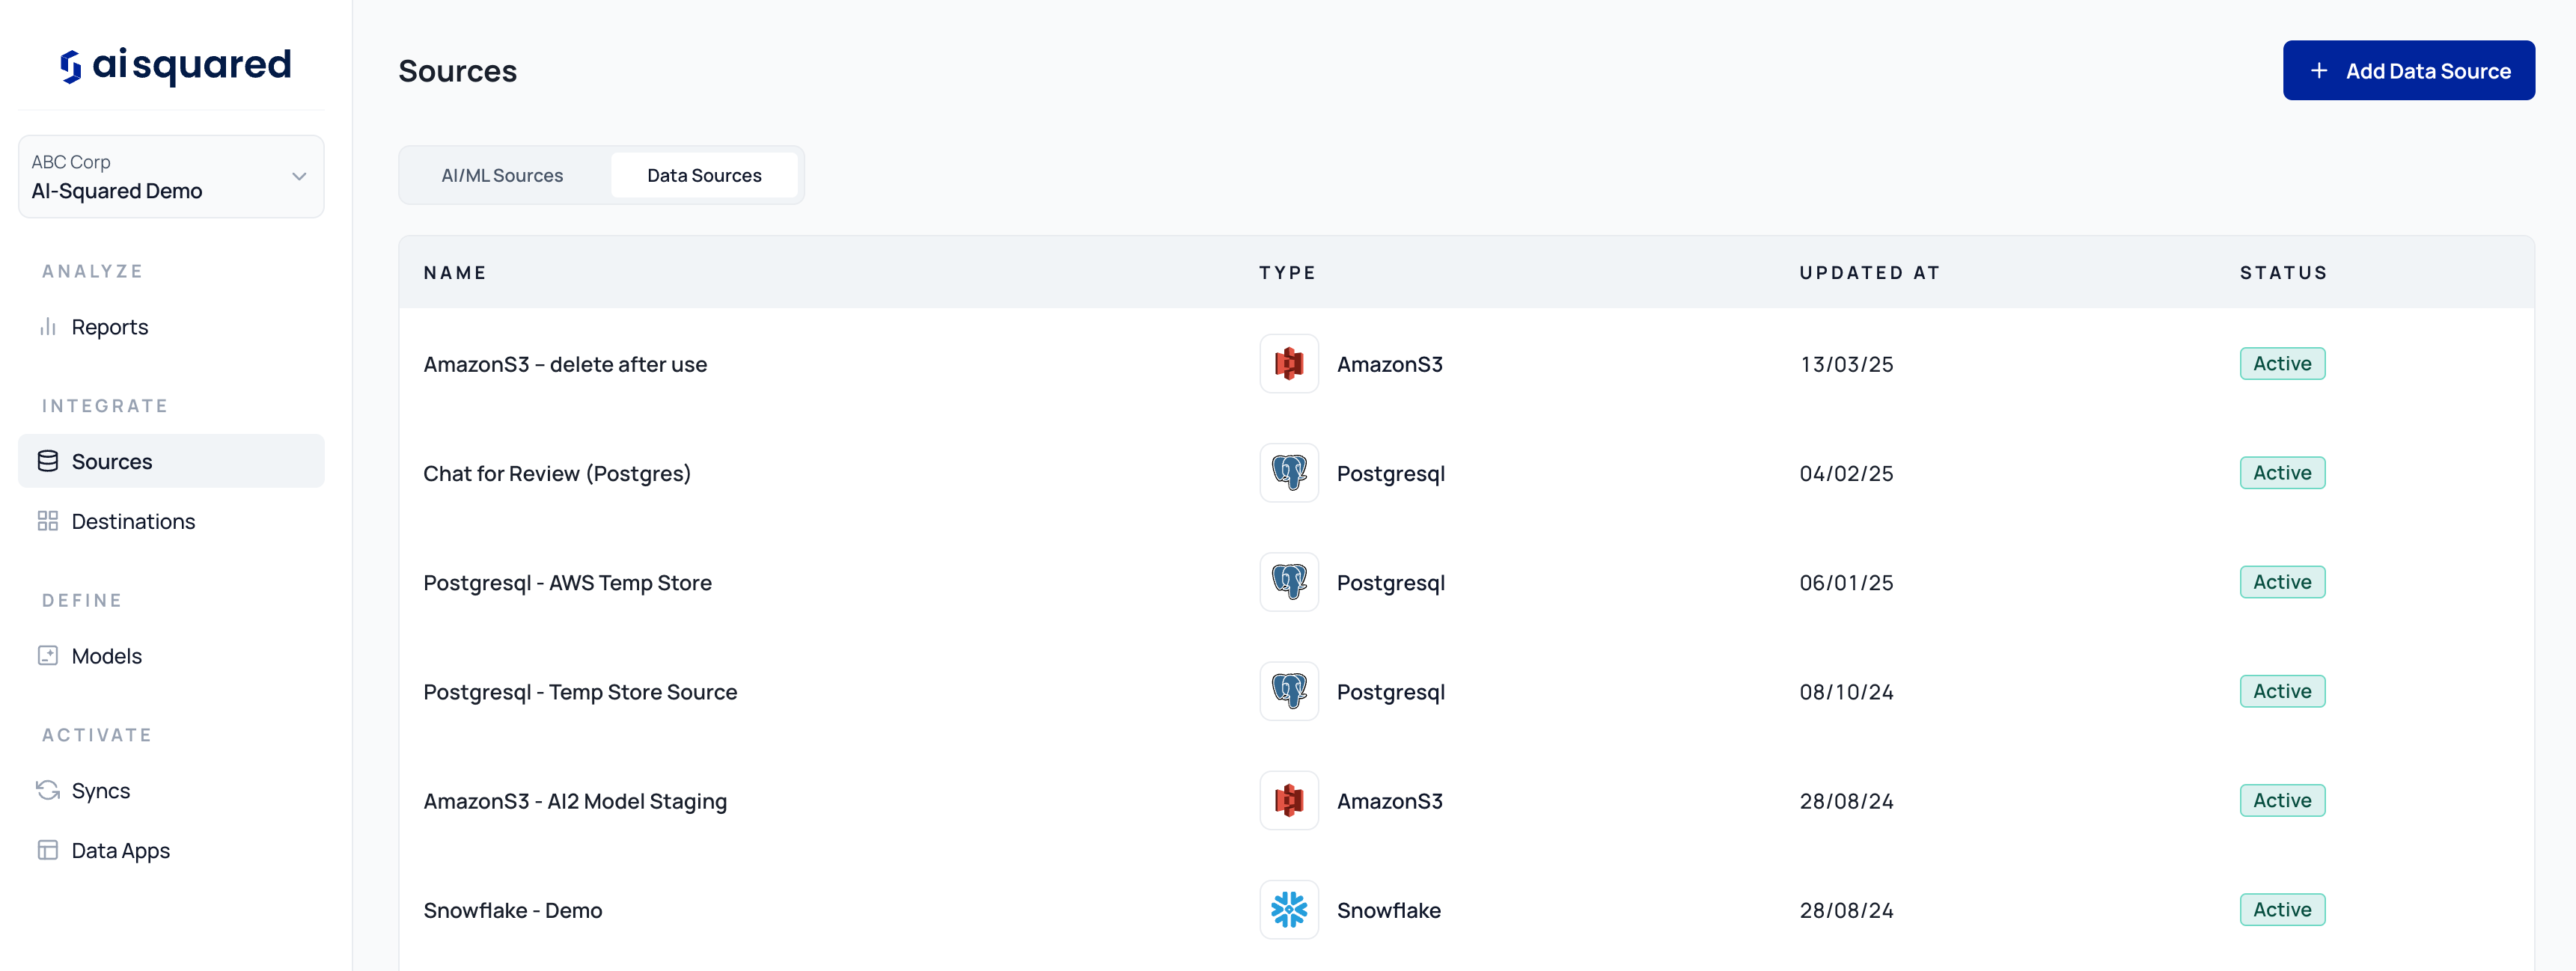 3. Select your connector from the available list (e.g., Snowflake, BigQuery, PostgreSQL, etc.).
 ***
## Step 2: Provide Connection Details
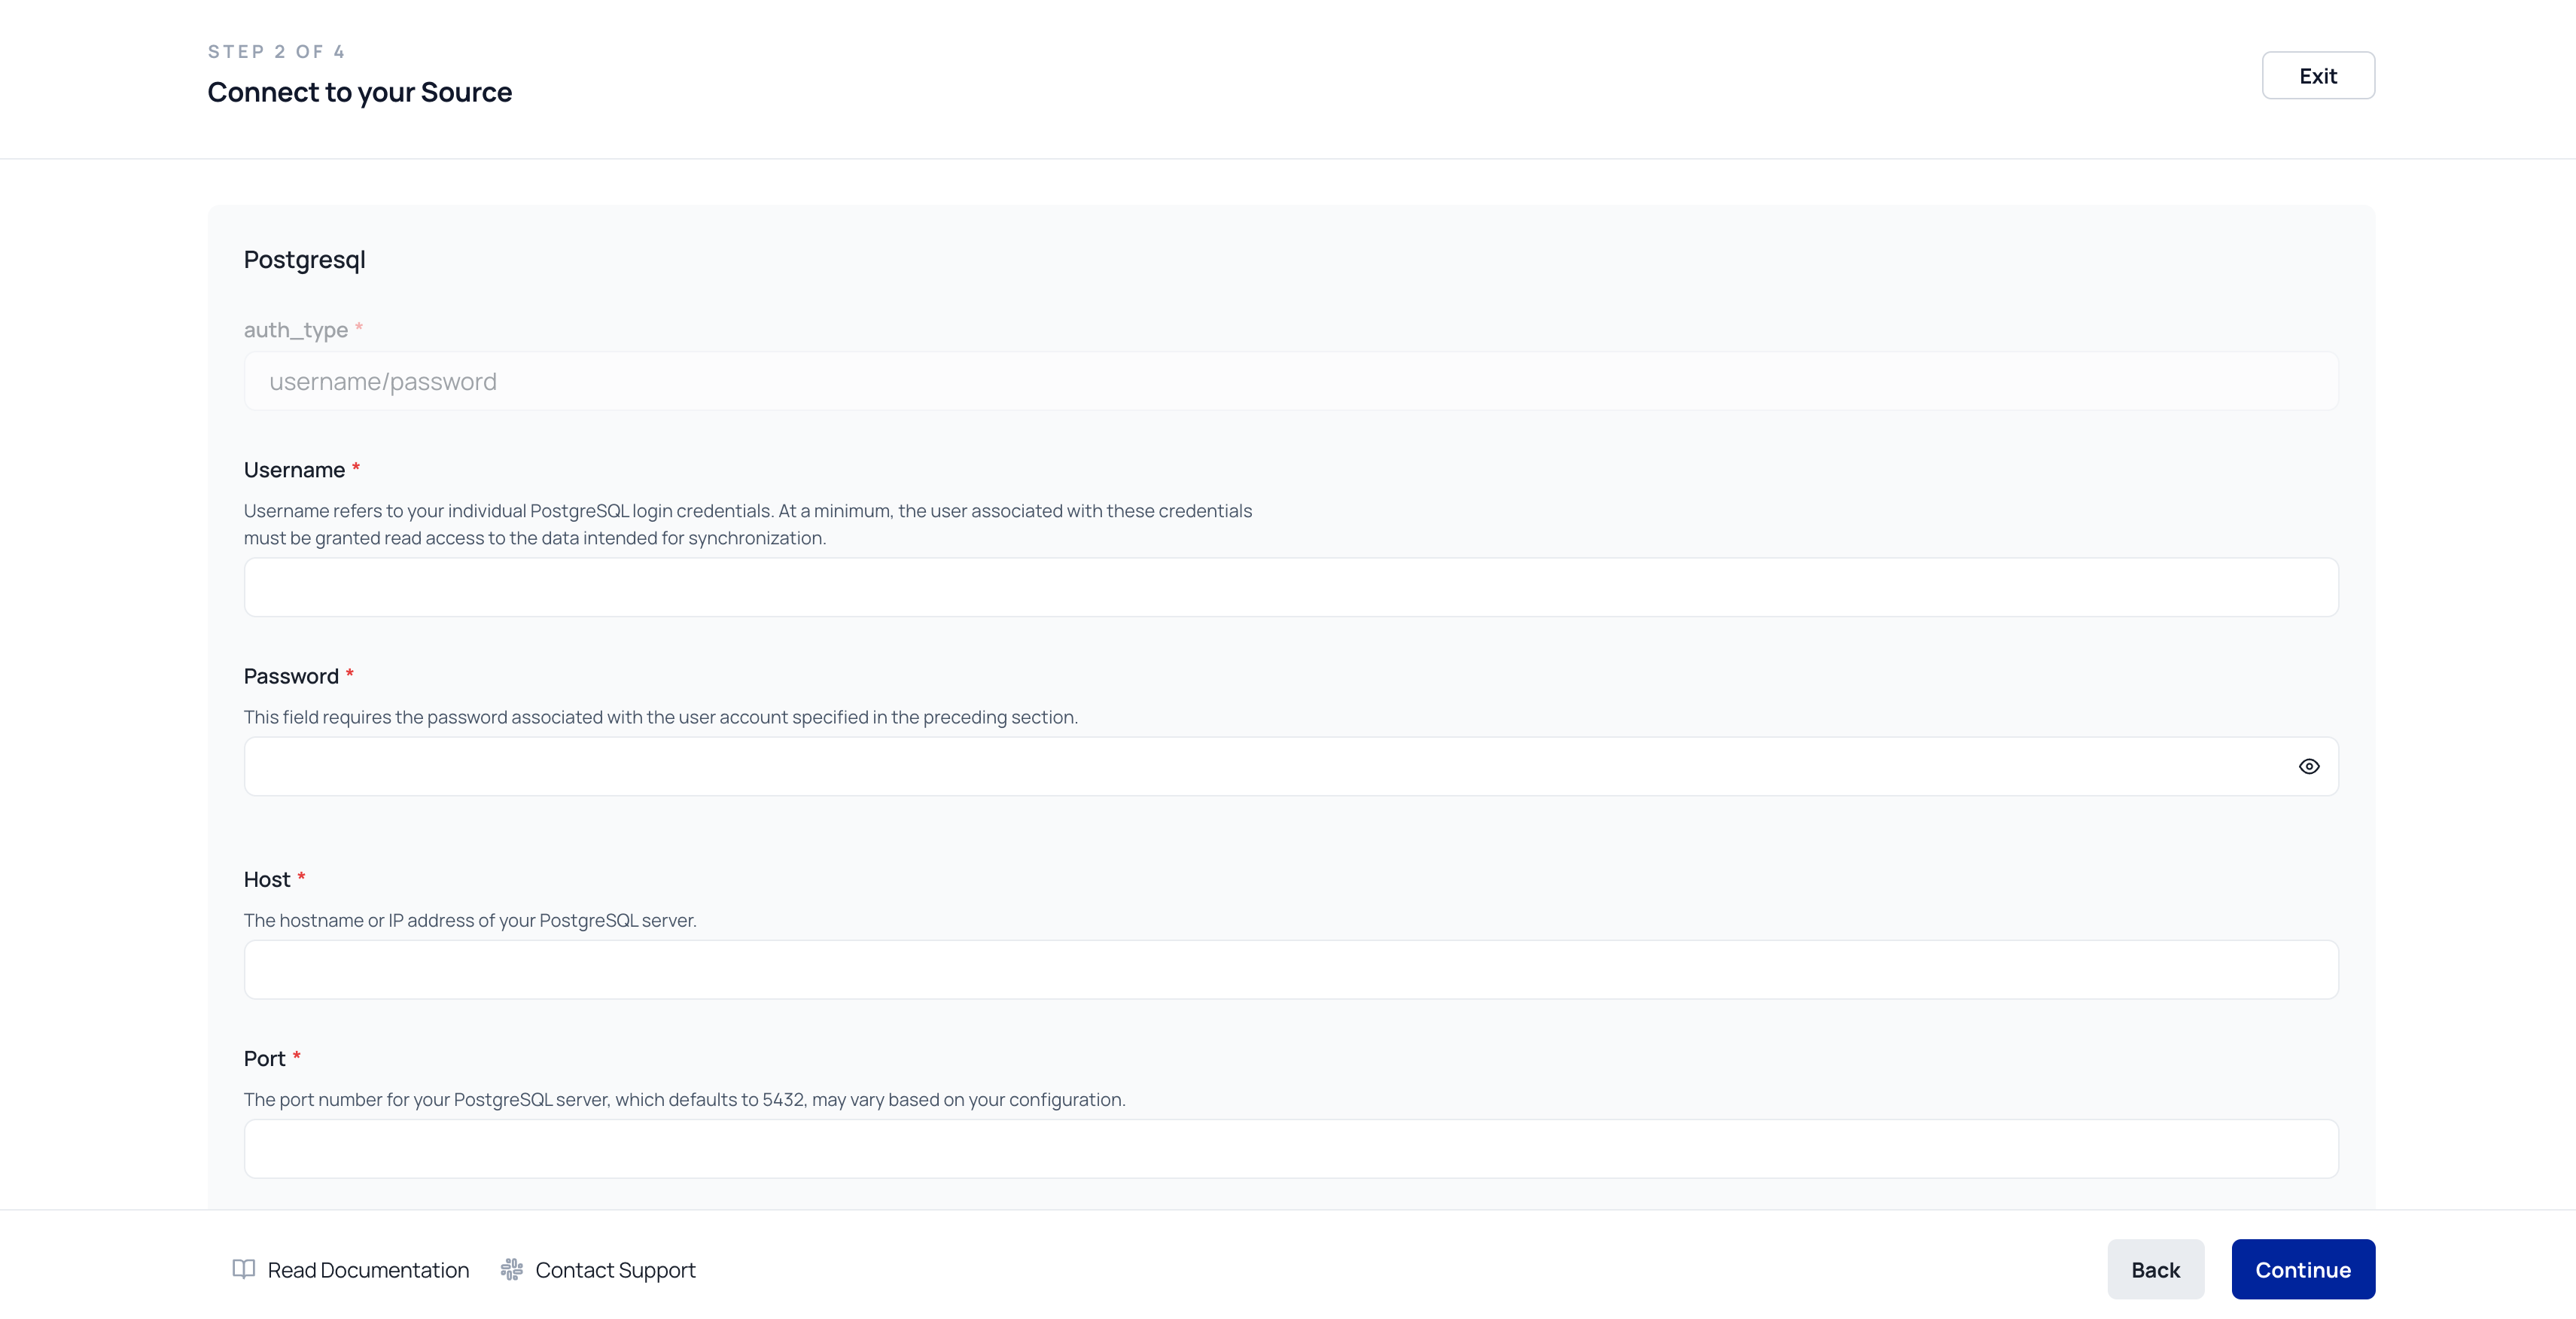
Each data source requires standard connection credentials. These typically include:
* **Source Name** – A descriptive label for your reference.
* **Host / Server URL** – Address of the database or data warehouse.
* **Port Number** – Default or custom port for the connection.
* **Database Name** – The name of the DB you want to access.
* **Authentication Type** – Options like password-based, token, or OAuth.
* **Username & Password / Token** – Credentials for access.
* **Schema (if applicable)** – Filter down to the relevant DB schema.
***
## Step 2: Provide Connection Details
Each data source requires standard connection credentials. These typically include:
* **Source Name** – A descriptive label for your reference.
* **Host / Server URL** – Address of the database or data warehouse.
* **Port Number** – Default or custom port for the connection.
* **Database Name** – The name of the DB you want to access.
* **Authentication Type** – Options like password-based, token, or OAuth.
* **Username & Password / Token** – Credentials for access.
* **Schema (if applicable)** – Filter down to the relevant DB schema.
 ***
## Step 3: Test the Connection
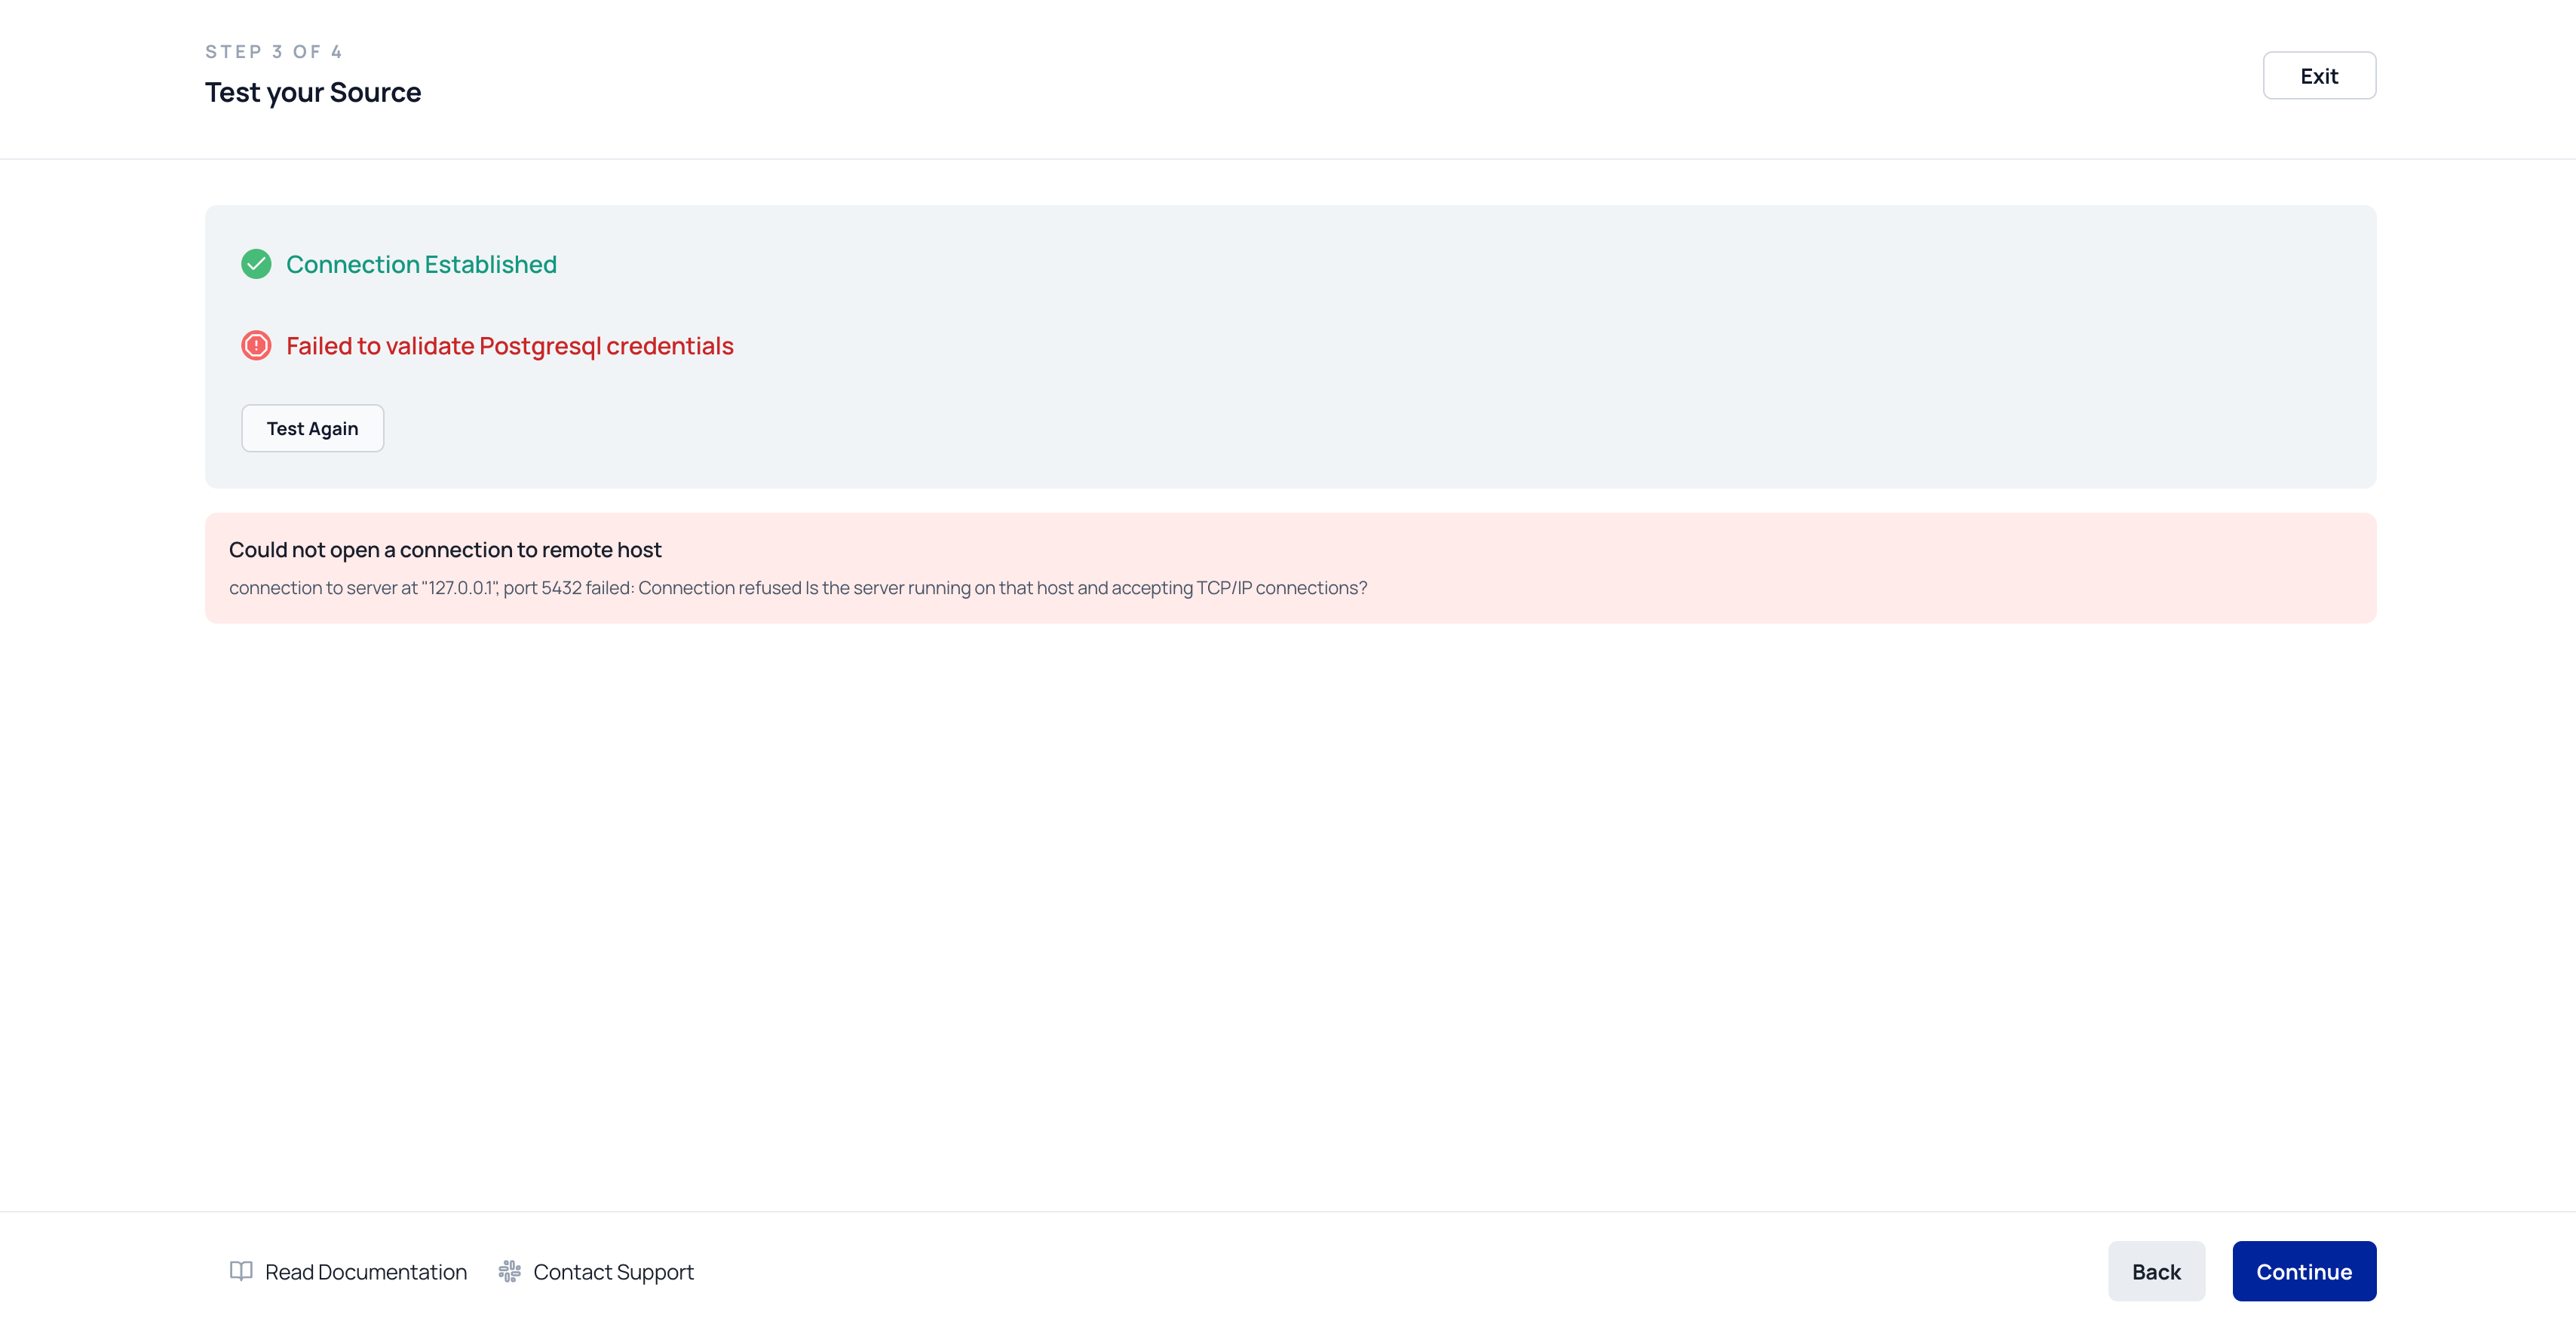
Click **“Test Connection”** to validate that your source credentials are correct and the system can access the data.
> ⚠️ Common issues include invalid credentials, incorrect hostnames, or firewall rules blocking access.
***
## Step 3: Test the Connection
Click **“Test Connection”** to validate that your source credentials are correct and the system can access the data.
> ⚠️ Common issues include invalid credentials, incorrect hostnames, or firewall rules blocking access.
 ***
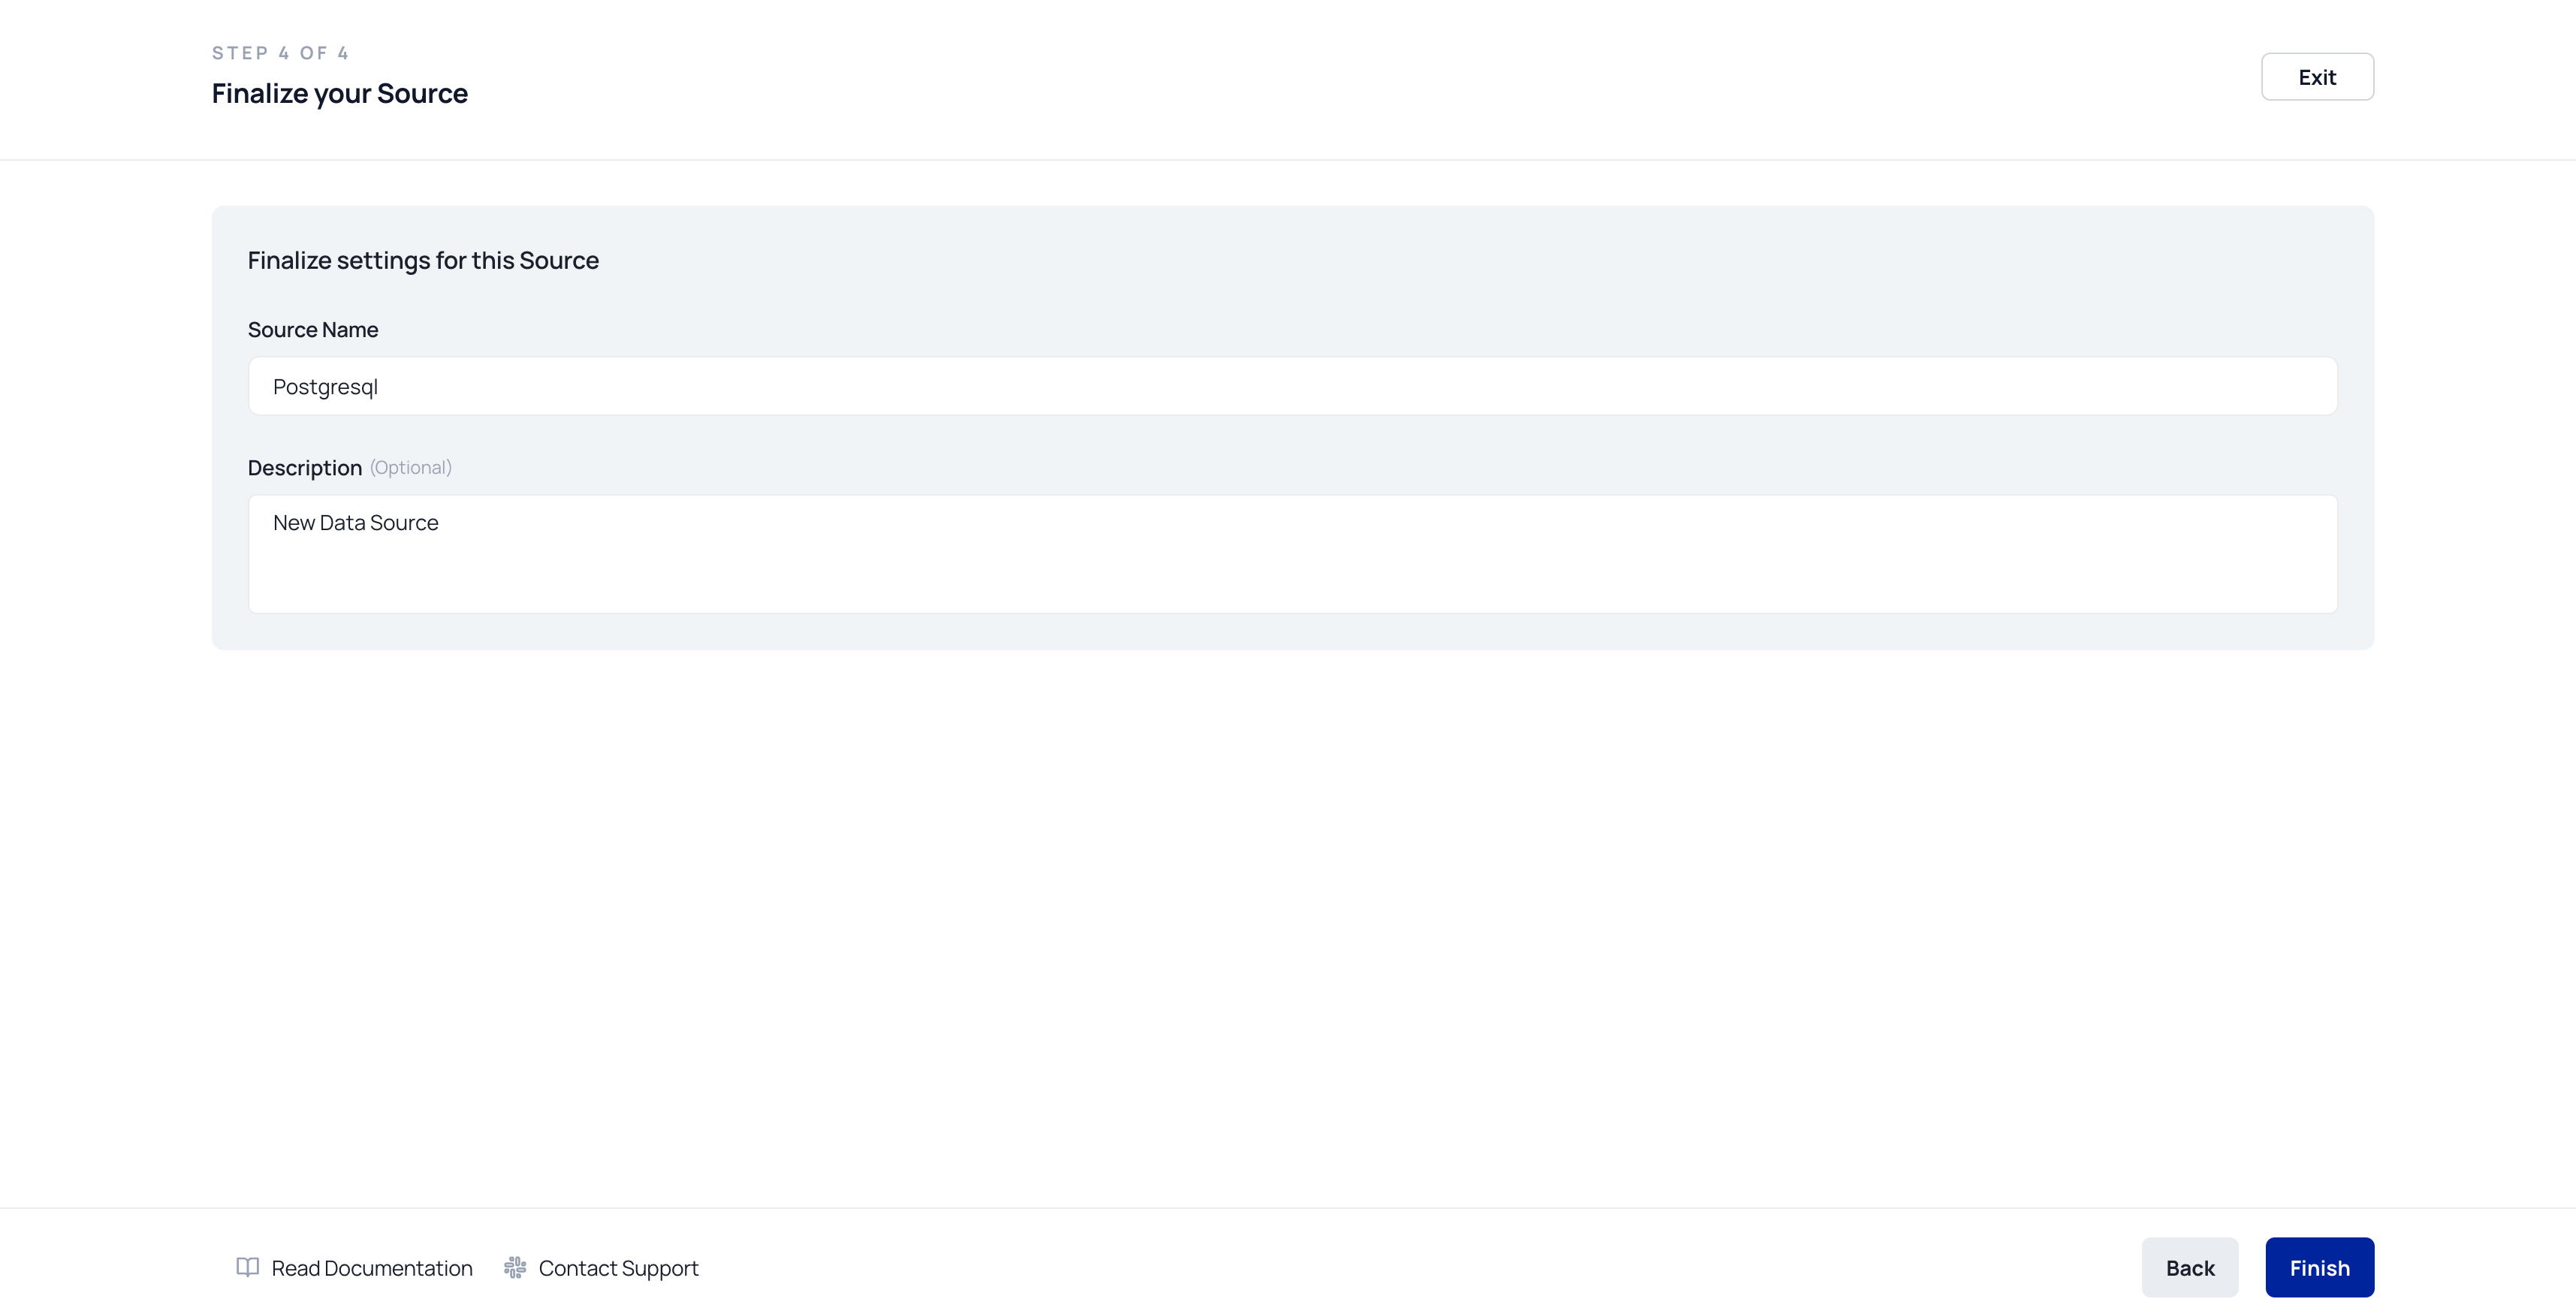
## Step 4: Save the Source
After successful testing:
* Click **Finish** to finalize the connection.
* The source will now appear under **Data Sources** in your account.
***
## Step 4: Save the Source
After successful testing:
* Click **Finish** to finalize the connection.
* The source will now appear under **Data Sources** in your account.
 ***
## Step 5: Next Steps — Use the Source
Once added, your data source can be used to:
* Create **Data Models** (via SQL editor, dbt, or table selector)
* Build **Syncs** to move transformed data into downstream destinations
* Enable AI apps to reference live or transformed business data
> 📘 Refer to the [Data Modeling](../data-activation/data-modelling) section to begin querying your connected source.
***
## ✅ You're All Set!
Your data source is now ready for activation. Use it to power AI pipelines, syncs, and application-level insights.
***
## Step 5: Next Steps — Use the Source
Once added, your data source can be used to:
* Create **Data Models** (via SQL editor, dbt, or table selector)
* Build **Syncs** to move transformed data into downstream destinations
* Enable AI apps to reference live or transformed business data
> 📘 Refer to the [Data Modeling](../data-activation/data-modelling) section to begin querying your connected source.
***
## ✅ You're All Set!
Your data source is now ready for activation. Use it to power AI pipelines, syncs, and application-level insights.