> ## Documentation Index
> Fetch the complete documentation index at: https://docs.squared.ai/llms.txt
> Use this file to discover all available pages before exploring further.
# HTTP Model Source Connector
> Guide on how to configure the HTTP Model Connector on the AI Squared platform
## Connect AI Squared to HTTP Model
This guide will help you configure the HTTP Model Connector in AI Squared to access your HTTP Model Endpoint.
### Prerequisites
Before starting, ensure you have the URL of your HTTP Model and any required headers for authentication or request configuration.
## Step-by-Step Guide to Connect to an HTTP Model Endpoint
## Step 1: Log in to AI Squared
Sign in to your AI Squared account and navigate to the **Source** section.
## Step 2: Add a New HTTP Model Source Connector
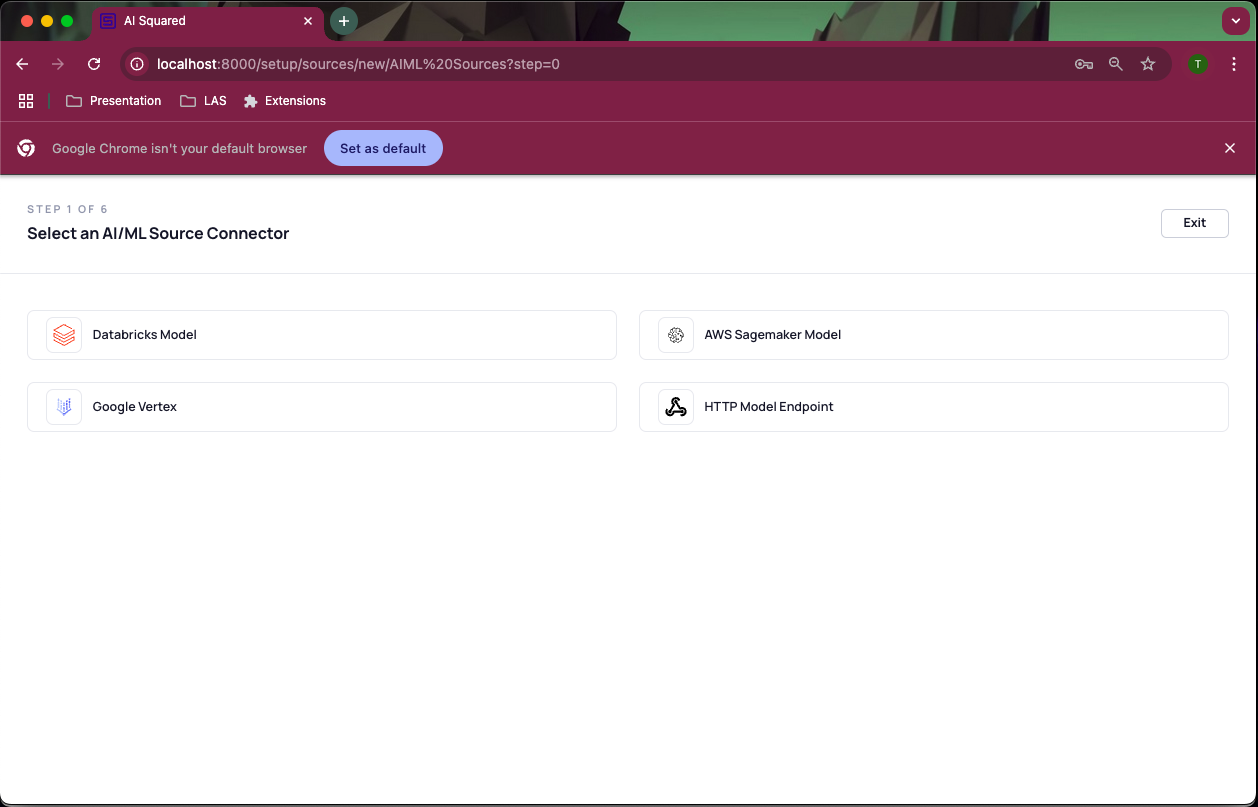
From AI/ML Sources in Sources click **Add Source** and select **HTTP Model** from the list of available source types.
 ## Step 3: Configure HTTP Connection Details
Enter the following information to set up your HTTP connection:
## Step 3: Configure HTTP Connection Details
Enter the following information to set up your HTTP connection:
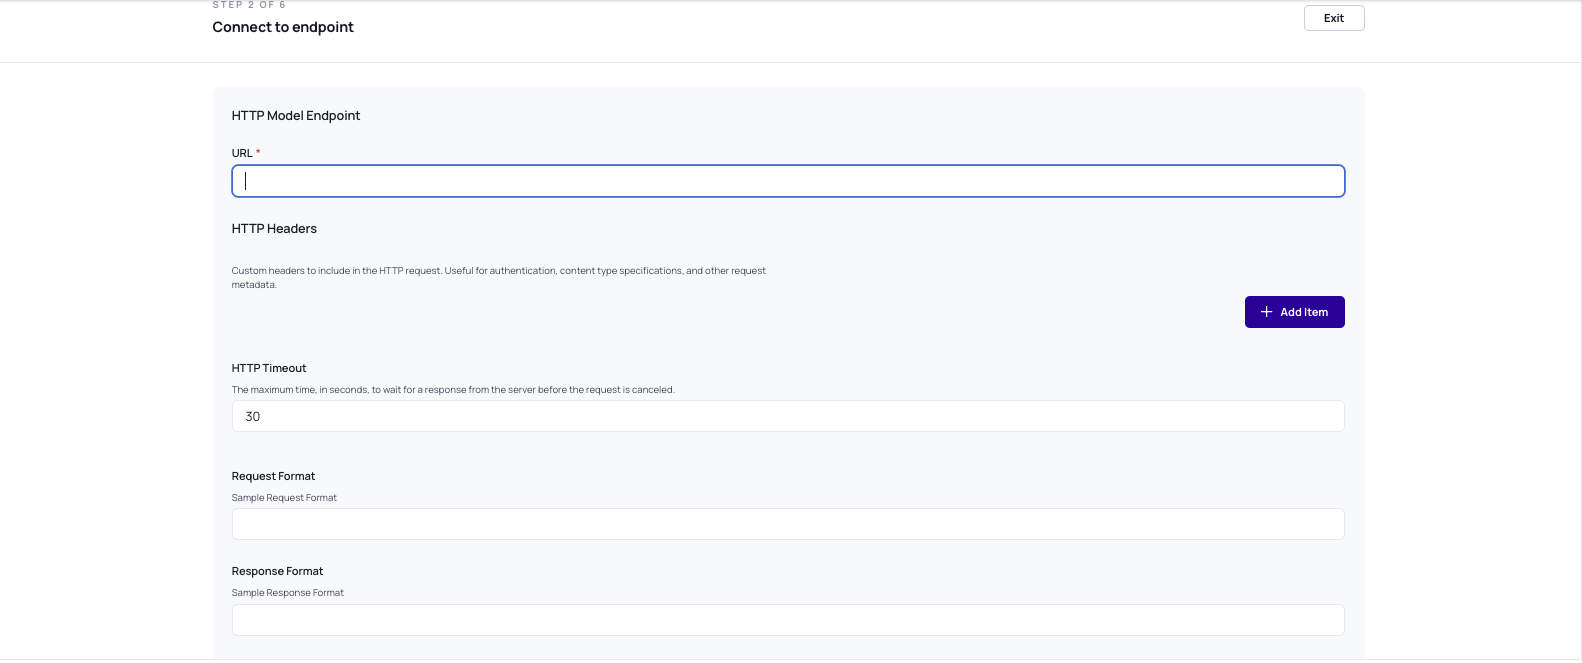 * **URL**: The URL where your model resides.
* **Headers**: Any required headers as key-value pairs, such as authentication tokens or content types.
* **Timeout**: The maximum time, in seconds, to wait for a response from the server before the request is canceled
## Step 4: Test the Connection
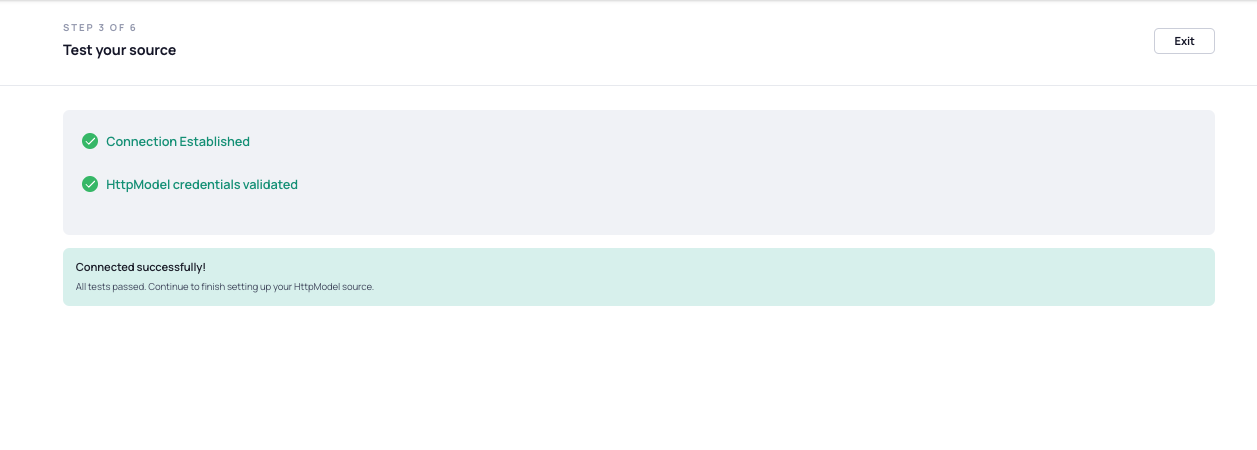
Use the **Test Connection** feature to ensure that AI Squared can connect to your HTTP Model endpoint. If the test is successful, you’ll receive a confirmation message. If not, review your connection details.
* **URL**: The URL where your model resides.
* **Headers**: Any required headers as key-value pairs, such as authentication tokens or content types.
* **Timeout**: The maximum time, in seconds, to wait for a response from the server before the request is canceled
## Step 4: Test the Connection
Use the **Test Connection** feature to ensure that AI Squared can connect to your HTTP Model endpoint. If the test is successful, you’ll receive a confirmation message. If not, review your connection details.
 ## Step 5: Save the Connector Settings
Once the connection test is successful, save the connector settings to establish the destination.
## Step 5: Save the Connector Settings
Once the connection test is successful, save the connector settings to establish the destination.